Dodge Journey: Fascia, front lower, closeout
REMOVAL
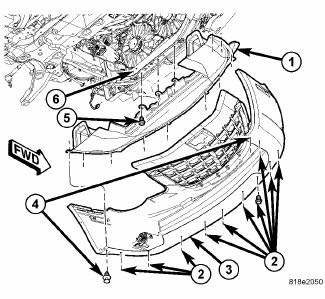
Fig. 11: Lower Fascia
1. Remove fasteners (5) to lower closeout.

Fig. 12: Push Pins - Front Lower Fascia
2. Remove push pins (1) to lower closeout.
3. Remove the front lower fascia.
INSTALLATION
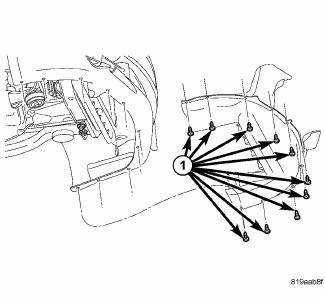
Fig. 13: Push Pins - Front Lower Fascia
1. Install the front lower fascia.
2. Install the push pins (1) to lower closeout.

Fig. 14: Lower Fascia
 Fascia, front
REMOVAL
Fig. 1: Pushpins
1. Release hood latch and open hood.
2. Remove the pushpins for the fascia (2) at the radiator support.
Fig. 2: Pop Rivets
3. Hoist and support vehicle on safety st ...
 Fascia, rear
REMOVAL
Fig. 15: Push Pins
1. Open the hatch.
2. Remove the 6 pushpins (1) securing the fascia (2).
Fig. 16: Rivets
3. Remove the rivets (2) and the Torx screw (3) around the wheel well for ...
See also:
With intermediate shaft
NOTE: The inner tripod joints are designed with a retention feature
that prevents the
tripod rollers from coming out of the inner joint housing up to a specific
load. If
this feature is o ...
Grid, defogger, rear
STANDARD PROCEDURE
GRID LINE AND TERMINAL REPAIR
WARNING: Materials contained in the Repair Kit (Part Number
04549275) may cause
skin or eye irritation. The kit contains epoxy resin an ...
Description, Operation
DESCRIPTION
Fig. 1: Battery Components
This vehicle is equipped with a single 12-volt battery. All of the components
of the battery system are located in
the front of the vehicle, just ahead of ...
