Dodge Journey: Disassembly
Fig. 229: Snap Ring At Output Shaft
1. Using Snap Ring Pliers (1) remove the snap ring (2) from the output shaft # 2.
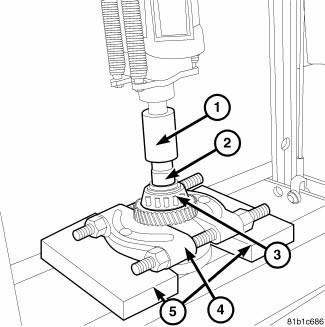
Fig. 230: Bearing From Cluster Shaft
2. Using a press, blocks, Bearing Splitter P-334 and an appropriate spacer (2) press sixth gear and case side bearing (3) from shaft.
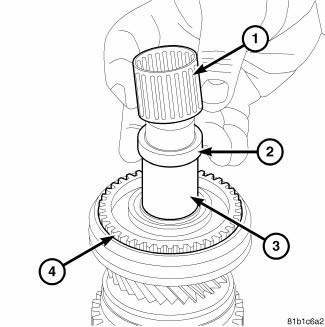
Fig. 231: Bearing Cage & Spacer Cluster
3. Remove sixth needle bearing cage (1) and spacer (2) from output shaft # 2 (3).
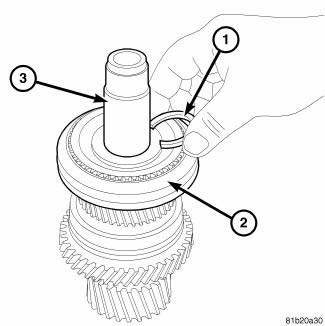
Fig. 232: Snap Ring At Output Shaft #2
4. Remove the snap ring (1) from the output shaft # 2 (3).
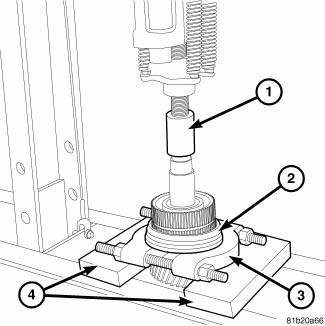
Fig. 233: Fifth Gear & Five/Six Synchronizer
5. Use Bearing Splitter P-334 (3), Blocks (4) and a press remove fifth gear and five/six synchronizer (2).
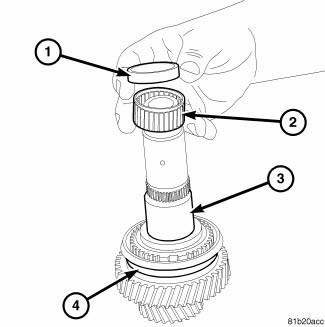
Fig. 234: #2 Bearing & Spacer
6. Remove fifth needle bearing cage (2) and spacer (1) from output shaft (3).

Fig. 235: Output Shaft & C-Clip
7. Remove the C-clip (1) from the output shaft (3).
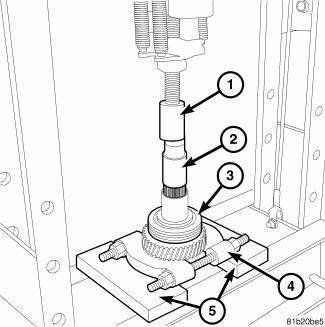
Fig. 236: Output Shaft #2 & Reverse Synchronizer
8. Use Bearing Splitter P-334 (4), Blocks (5) and a press to remove reverse gear and reverse synchronizer (3) from the output shaft # 2.
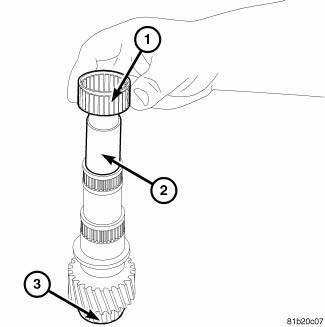
Fig. 237: Output Shaft #2 & Needle Bearing
9. Remove the reverse needle bearing (1) from the output shaft # 2 (2).
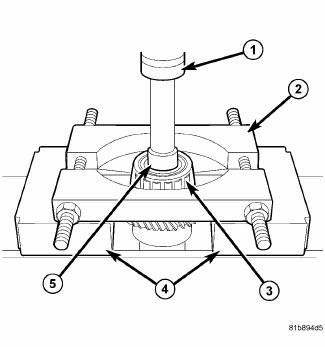
Fig. 238: Output Shaft & Bellhousing Side Bearing
10. Using a Press (1) and Splitter 1130 (2) to remove the bellhousing side bearing (3) from the output shaft # 2(5).

 Assembly
Fig. 239: Output Shaft #2 & Needle Bearing
1. Install the reverse needle bearing (1) onto the output shaft # 2 (2).
Fig. 240: Synchronizer
NOTE: Pay attention to the direction when inser ...
See also:
MEDIA CENTER 130 (RES) — AM/FM STEREO RADIO WITH CD PLAYER (MP3 AUX JACK)
NOTE: The radio sales code is located on the lower right
side of the radio faceplate.
RES Radio
Operating Instructions — Radio Mode
NOTE: The ignition switch must be in the ON or ACC
position ...
Bearing(s), crankshaft, main
Standard Procedure
CRANKSHAFT MAIN BEARING FITTING
Fig. 169: Cylinder Block Main Bore Grade Marking
The grade marks for the cylinder block main bearing bore grade is located on
the pan rail jus ...
FREEING A STUCK VEHICLE
If your vehicle becomes stuck in mud, sand, or snow, it
can often be moved by a rocking motion. Turn your
steering wheel right and left to clear the area around the
front wheels. Then shift back an ...
