Dodge Journey: Assembly
NOTE: Cleanliness through entire disassembly and assembly of the valve body cannot be overemphasized. When disassembling, each part should be washed in a suitable solvent, then dried by compressed air. Do not wipe parts with shop towels. All mating surfaces in the valve body are accurately machined; therefore, careful handling of all parts must be exercised to avoid nicks or burrs.
NOTE: If valve body assembly is reconditioned, the PCM/TCM Quick Learn Procedure must be performed.
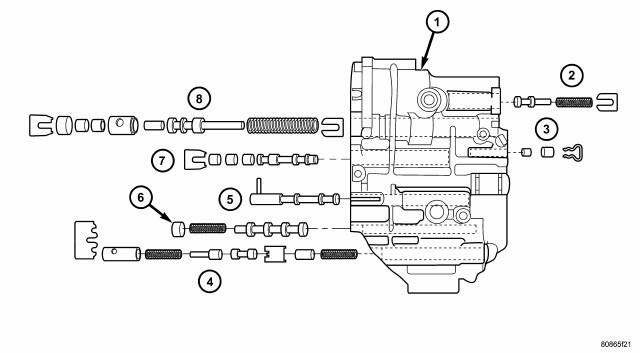
Fig. 460: Identifying Valve Body Assembly
- - VALVE BODY
- - T/C REGULATOR VALVE
- - L/R SWITCH VALVE
- - CONVERTER CLUTCH CONTROL VALVE
- - MANUAL VALVE
- - CONVERTER CLUTCH SWITCH VALVE
- - SOLENOID SWITCH VALVE
- - REGULATOR VALVE
1. Install valves and springs.
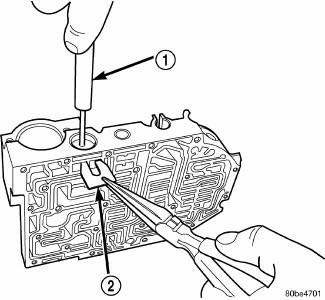
Fig. 461: Removing/Installing Regulator Valve Spring Retainer
- - REMOVER/INSTALLER 6302
- - RETAINER
2. Install regulator valve spring retainer (2) using remover/installer 6302 (1).
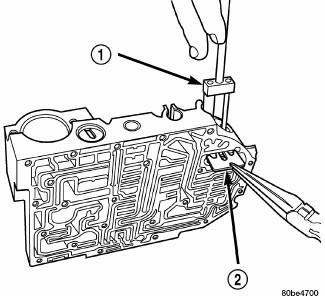
Fig. 462: Removing/Installing Dual Retainer Plate
- - REMOVER/INSTALLER 6301
- - RETAINER
3. Install dual retainer plate (2) using remover/installer 6301 (1).
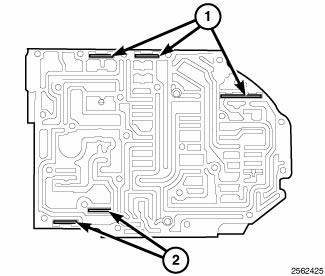
Fig. 463: Removing/Installing Valve Retainers
- - RETAINER
- - RETAINER
4. Verify that all retainers are installed (1,2). Retainers should be flush or below valve body surface.
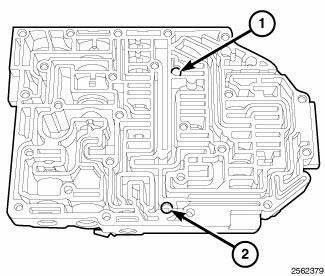
Fig. 464: Identifying Valve Body Check Balls
- - (#4) REVERSE CHECK BALL
- - (#5) (#3 ) L/R CHECK BALL
5. Install check balls (1 and 2) into position as shown in Fig. 464. If necessary, secure them with petrolatum or transmission assembly gel for assembly ease.
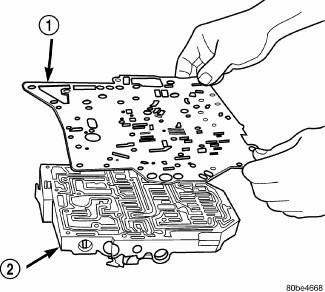
Fig. 465: Removing/Installing Separator Plate
- - SEPARATOR PLATE
- - VALVE BODY
6. Install separator plate (1) to valve body (2).
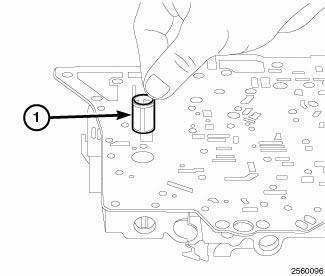
Fig. 466: Identifying Oil Screen
7. Install oil screen (1) to separator plate.
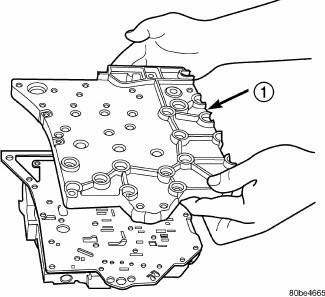
Fig. 467: Removing/Installing Transfer Plate
- - TRANSFER PLATE
8. Install transfer plate (1) to valve body and separator plate.
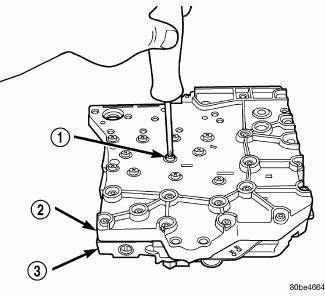
Fig. 468: Identifying Valve Body-To-Transfer Plate Screws
- - SCREW (24)
- - TRANSFER PLATE
- - VALVE BODY
9. Install twenty-four transfer plate to valve body screws (1) and torque to 5 N.m (45 in. lbs.).
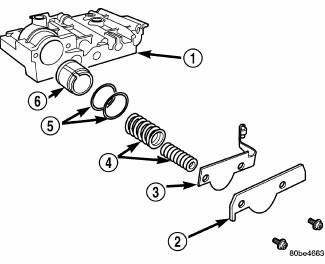
Fig. 469: Identifying 2/4 Accumulator Assembly
- - VALVE BODY
- - RETAINER PLATE
- - DETENT SPRING
- - SPRINGS
- - SEALS
- - PISTON
10. Install 2/4 Accumulator components (2,3,4,5 and 6).
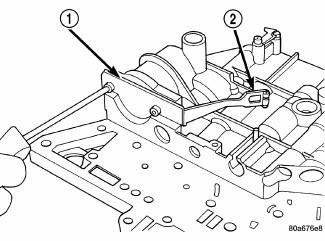
Fig. 470: Removing/Installing 2/4 Accumulator Retaining Plate
- - 2-4 ACCUMULATOR RETAINING PLATE
- - DETENT SPRING
11. Torque 2/4 Accumulator retainer (1) to 5 N.m (45 in. lbs.).
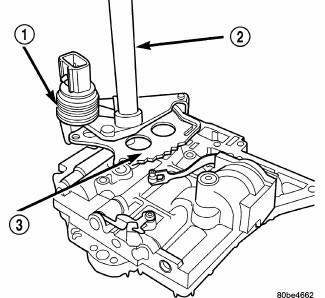
Fig. 471: Removing/Installing Manual Shaft/Rooster Comb & Transmission Range
Sensor
- - TRANSMISSION RANGE SENSOR
- - MANUAL SHAFT / ROOSTER COMB
- - ROOSTER COMB
12. Install Manual Shaft/Rooster Comb (3) and Transmission Range Sensor (1).
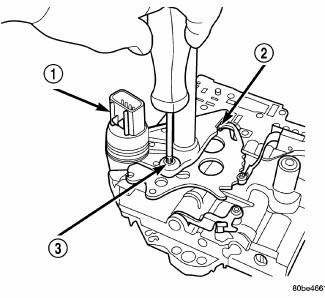
Fig. 472: Removing/Installing Transmission Range Sensor
- - TRANSMISSION RANGE SENSOR
- - MANUAL VALVE CONTROL PIN
- - RETAINING SCREW
13. Make sure Manual Valve control pin (2) is contained within the rooster comb slot. Install Transmission Range Sensor retaining screw (3) and torque to 5 N.m (45 in. lbs.).
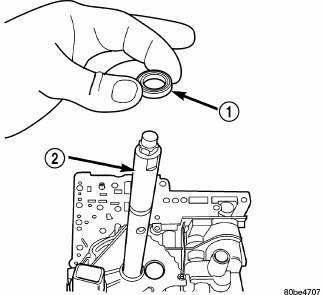
Fig. 473: Removing/Installing Manual Shaft Seal
- - SEAL
- - MANUAL SHAFT
14. Install manual shaft seal (1).
 Disassembly
NOTE: Cleanliness through entire disassembly and assembly of the valve
body cannot
be overemphasized. When disassembling, each part should be washed in a
suitable solvent, then dried by comp ...
 Installation
Fig. 474: Removing/Installing Valve Body
- VALVE BODY
NOTE: If valve body assembly is being replaced or reconditioned, it is
necessary to
perform the PCM Quick Learn Procedure.
1. ...
See also:
Arm, lower control
Diagnosis and Testing
LOWER CONTROL ARM
Inspect the lower control arm for signs of damage from contact with the
ground or road debris. If the lower
control arm shows any sign of damage, look for ...
ELECTRONIC SPEED CONTROL — IF EQUIPPED
When engaged, the Electronic Speed Control takes over
the accelerator operation at speeds greater than 25 mph
(40 km/h).
The Electronic Speed Control lever is located on the right
side of the stee ...
Removal
Fig. 35: Removing/Installing Halfshaft Nut
NOTE: Rear suspension and drivetrain design require this procedure to
be performed
on a "drive-on" hoist, as the front and rear suspensi ...
