Dodge Journey: Installation
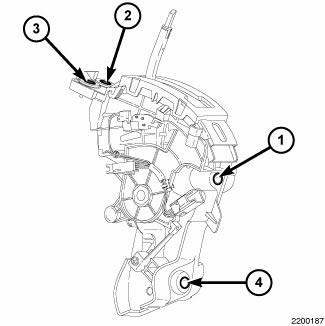
Fig. 404: Identifying Shifter Mounting Bolts
1. Install the shifter mounting bolts and tighten to 20 N.m (15 ft. lbs.) in the proper sequence as indicated on drawing.
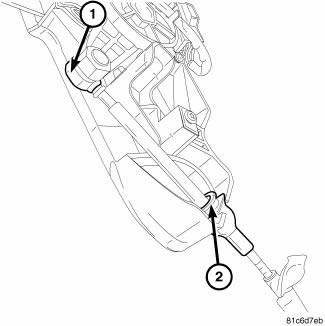
Fig. 405: Identifying Shift Cable At Shifter
NOTE: Ensure the lock tab is in the lock position after the cable is installed onto the shifter housing (2).
2. Install the shift cable (1, 2) at the shifter.
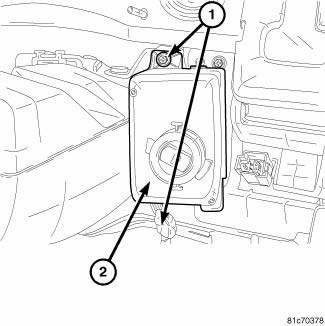
Fig. 406: Removing/Installing Screws At Win
3. Install the WIN (2) and install the mounting screws (1).
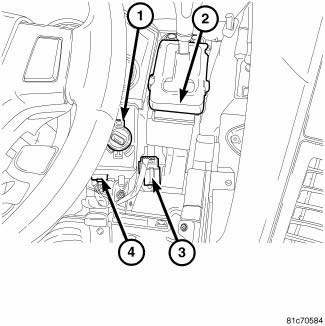
Fig. 407: Identifying Electrical Connectors At WIN & Shifter
4. Connect the electrical connectors (3, 4) at the WIN (1) and the shifter (2).
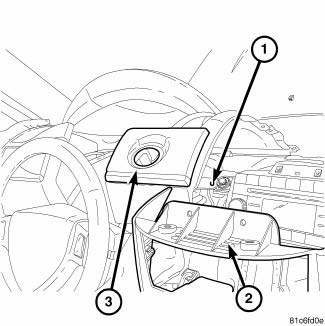
Fig. 408: Removing/Installing I/P Cover
5. Install the I/P cover (3).
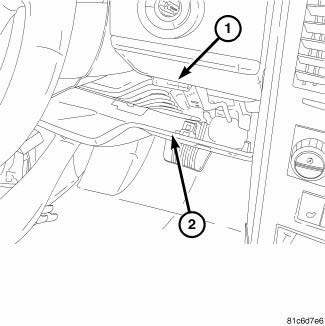
Fig. 409: Identifying Knee Blocker
6. Install the knee blocker (2).
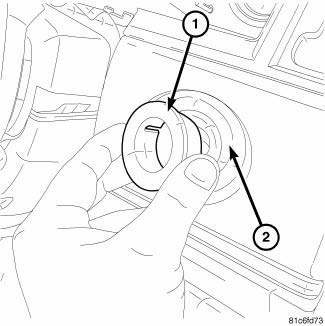
Fig. 410: Removing/Installing Ignition Switch Bezel
7. Install the shift knob.
8. Install the ignition switch bezel (1) to I/P cover (2).

Fig. 411: Pulling Center Stack Back
9. Install center stack cover (1) back into position.
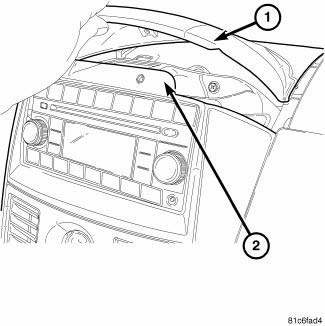
Fig. 412: Removing/Installing Center Stack Cover
10. Install the center stack top cover (1) back.
11. Install the cluster bezel.
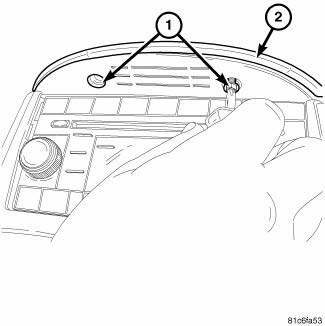
Fig. 413: Removing/Installing Screws At Center Stack Cover
12. Install the screws (1) at the center stack cover (2).
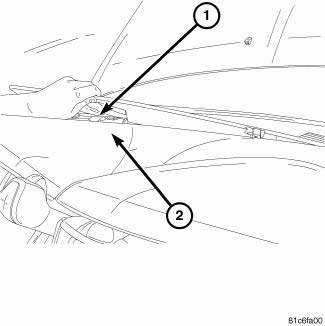
Fig. 414: Removing/Installing Defroster Cover
13. Install the defroster cover (1).
14. Connect the battery cable.
 Removal
Fig. 393: Removing/Installing Defroster Cover
1. Disconnect the negative battery cable.
2. Using a trim stick remove the defroster cover (1).
Fig. 394: Removing/Installing Screws At Center St ...
 Solenoid, pressure control
DESCRIPTION
Fig. 415: Identifying Variable Line Pressure Components
- PRESSURE CONTROL SOLENOID
- LINE PRESSURE SENSOR
- SHOULDER SCREW
- VARIABLE LINE PRESSURE HEADER
- MANUAL SHAFT
...
See also:
Description, Operation
DESCRIPTION
A Macpherson type design strut assembly is used in place of the traditional
front suspension upper control arm
and upper ball joint. The bottom of the strut mounts directly to the stee ...
Diagnosis and Testing
SUSPENSION AND STEERING
CONDITION
POSSIBLE
CAUSES
CORRECTION
Front End Whine On Turns
1. Defective Wheel
Bearing2. Incorrect Wheel
Alignment
3. Worn Tires
...
Manifold, exhaust, rear
Removal
Fig. 305: Belly Pan
- belly pan fasteners
- belly pan
1. Remove the belly pan (2).
Fig. 306: Oxygen Sensors
2. Remove the oxygen sensors (2) and (4).
Fig. 307: Exhaust Gas R ...
