Dodge Journey: Antenna, satellite, audio, video
ANTENNA, SATELLITE, AUDIO
DESCRIPTION
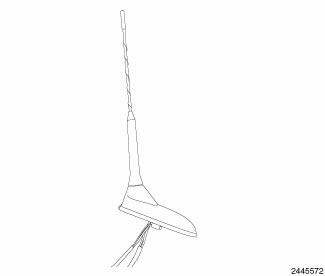
Fig. 3: Satellite Audio
If the vehicle is equipped with satellite audio, a combined antenna for AM/FM and satellite is used. For removal. See Removal and for installation, see Installation .
REMOVAL
1. Disconnect and isolate the battery negative cable.
2. Lower the appropriate portion of the headliner as necessary to access the underside of the antenna.
3. Disconnect the antenna electrical connectors.
4. Remove the fastener and retainer.
5. From inside the vehicle, using a flat bladed tool, depress one of the retaining tabs on the antenna. Push one side of the antenna connector through the roof panel. Depress the other side of the connector and remove the antenna.
INSTALLATION
1. Insert the antenna electrical connector through the hole in the roof panel.
2. Press the antenna into position until both retainers snap into place. Tighten to 9 N.m (80 in. lbs.).
3. Connect the antenna electrical connector to the antenna.
4. Install headliner.
5. Connect negative battery cable.
ANTENNA, SATELLITE, VIDEO
DESCRIPTION
The satellite video antenna cable connects the roof mounted antenna to the satellite receiver. It has two connectors at each end and is routed above the headliner, then down the right side A-pillar to the cowl area.
OPERATION
The satellite video antenna receives signals from orbiting satellites and sends these signals to the satellite receiver module. The satellite video antenna must have open space in which to operate. Items carried on the roof, parking inside etc. can have an effect on the antenna's ability to receive signals.
REMOVAL
1. Disconnect and isolate the battery negative cable.
2. Lower the appropriate portion of the headliner as necessary, to access the underside of the antenna.
3. Disconnect the electrical connectors from the antenna.
4. Remove the fastener and retainer.
5. From inside the vehicle, using a flat bladed tool, depress one of the retaining tabs on the antenna. Push up one side of the antenna connector through the roof panel. Depress the other side of the connector and remove the antenna.
INSTALLATION
1. From inside the vehicle, using a flat bladed tool, depress one of the retaining tabs on the antenna. Push up one side of the antenna connector through the roof panel. Depress the other side of the connector and remove the antenna.
2. Connect the electrical connector to the antenna.
3. Install the headliner.
4. Connect battery negative cable.
 Amplifier
DESCRIPTION
The optional premium speaker system includes a separate audio power
amplifier. The amplifier is an eight
channel unit. The amplifier is located behind the right cowl trim panel.
OPERA ...

See also:
Sensor, exhaust temperature
REMOVAL
EXHAUST TEMPERATURE SENSOR
Fig. 44: Exhaust Temperature Sensor
- DPF TEMPERATURE SENSOR ELECTRICAL CONNECTOR
- DPF TEMPERATURE SENSOR
1. Remove engine cover.
2. Disconnect and ...
Description
MANUAL TEMPERATURE CONTROL (MTC) SINGLE ZONE
The A/C-heater control for the front Manual Temperature Control (MTC) single
zone system allows one
temperature setting for the entire vehicle. All con ...
Pump, water
Description
2.4L
Fig. 80: WATER PUMP - WORLD ENGINE
- ACCESSORY DRIVE BELT
- WATER PUMP PULLEY
- WATER PUMP
The water pump (3) on the world engine is attached to the water pump adapter ...
