Dodge Journey: Installation
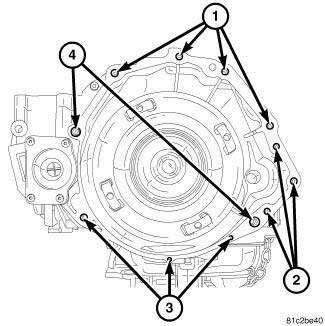
Fig. 164: Removing/Installing Bellhousing Upper & Lower Bolts
NOTE: If transaxle assembly is being replaced or overhauled (clutch and/or seal replacement), it is necessary to perform the "Quick-Learn" Procedure.
1. Install the transaxle assembly into vehicle.
2. Install the bellhousing upper (1) and lower bolts (2) and tighten to 75 N.m (55 ft. lbs.).
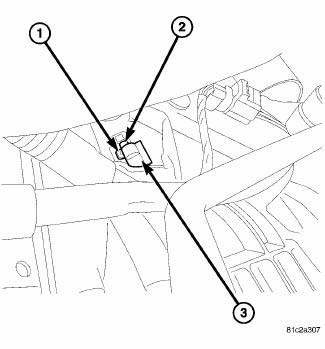
Fig. 165: Removing/Installing CKP Sensor
3. Install and connect crank position sensor and tighten bolt to 12 N.m (106 in. lbs.)
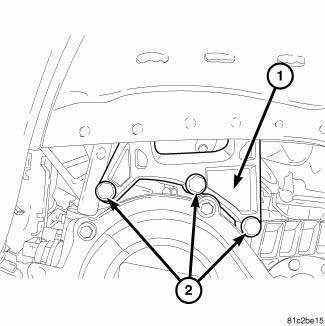
Fig. 166: Removing/Installing Left Mount To Block Bolts
4. Install left mount bracket assembly (1) to transaxle and tighten bolts (2) to 54 N.m (40 ft. lbs.).

Fig. 167: Removing/Installing Torque Converter-To-Drive Plate Bolts
5. Raise engine/transaxle assembly into position.
6. Install torque converter-to-drive plate bolts and tighten to 88 N.m (65 ft. lbs.)
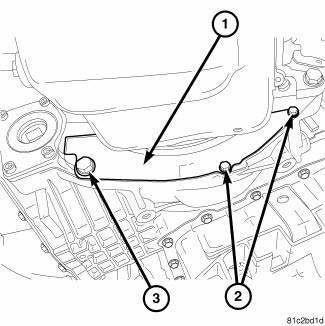
Fig. 168: Removing/Installing Inspection Cover
7. Install inspection cover.
8. Install inspection cover (1) and tighten the larger fastener (3) to 95 N.m (70 ft. lbs.) and the smaller fasteners (2) to 12 Nm (70 ft. lbs.).
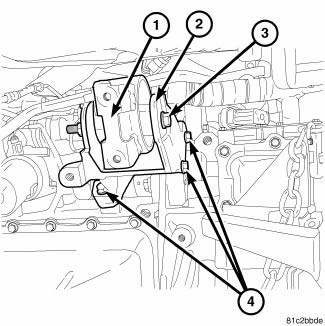
Fig. 169: Removing/Installing Front Transmission Mount
9. Install front mount to transmission (2).
10. Install front mount bolts (4) and tighten to 95 N.m (70 ft. lbs.).
11. Install the starter motor.

Fig. 170: Identifying Heater Tube & Ground Cable Bolt At Front Mount
12. Install the bolt (2) holding the ground cable (1) and the heater tube bracket (3) to the front mount (4).
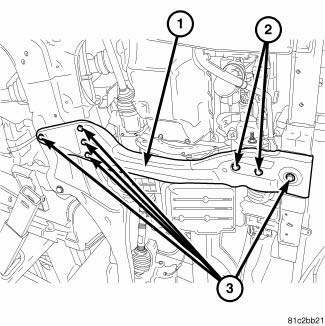
Fig. 171: Removing/Installing Crossmember
13. Install the crossmember (1).
14. Install the bolts at the crossmember (2, 3) and tighten to 40 N.m (30 ft. lbs.).
15. Remove the transmission jack and screw jack at engine.
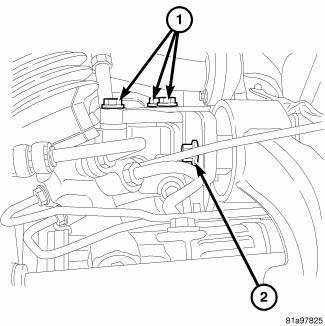
Fig. 172: Identifying Rear Mount Bracket-To-Transaxle Case Bolts
16. Lower the hoist.
17. Install left and right halfshaft assemblies. 18. Install front wheel/tire assemblies.
19. install rear mount bracket-to-transaxle case bolts (1) and tighten to 75 N.m (55 ft. lbs.).
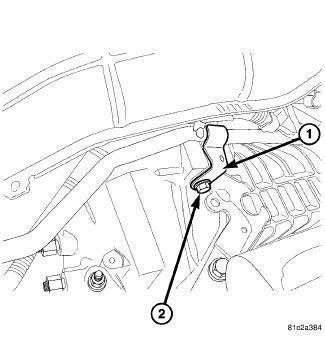
Fig. 173: Identifying Heater Tube Bolt At Bellhousing
20. Install the heater tube bolt (1) at the bellhousing and tighten to 5 N.m (44 in. lbs.).
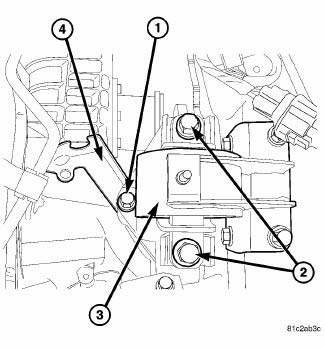
Fig. 174: Identifying Left Mount Bolts
21. Insure that the shift cable bracket (4) is in place.
22. Install the bolts at left mount (1, 2) and tighten to 95 N.m (70 ft. lbs.).

Fig. 175: Identifying Shift Cable At Manual Valve & Cable Bracket
23. Connect gear shift cable to the manual valve lever (4) and shift cable bracket (2)
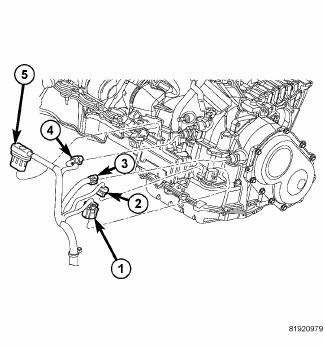
Fig. 176: Identifying Transmission Electrical Connectors
24. Connect the electrical connectors at transmission (1, 2, 3, 4 and 5).
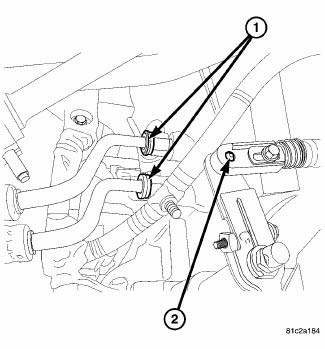
Fig. 177: Identifying Oil Cooler Lines
24. Connect the electrical connectors at transmission (1, 2, 3, 4 and 5).

Fig. 178: Removing/Installing Fluid Level Indicator/Tube Assembly
26. Install fluid level indicator/tube assembly (1).
27. Install the bolt (2) at the fluid level indicator/tube assembly and tighten to 5 N.m (44 in. lbs.).
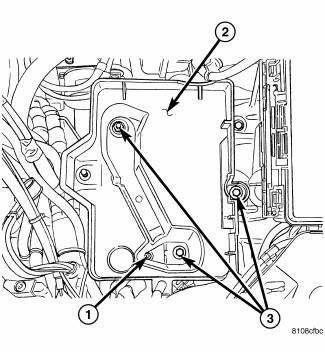
Fig. 179: Removing/Installing Battery Tray
28. Install the battery tray (2).
29. Install the tie straps holding harness and ground cable to the battery tray.
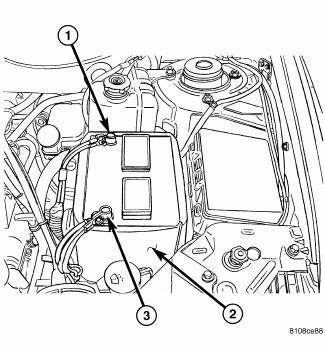
Fig. 180: Identifying Battery Cables
30. Install the battery (2) and battery hold down bolt (3).
31. Connect battery cables.
32. Fill transaxle.
 Assembly
Fig. 97: Installing Output Bearing Cups
- OUTPUT BEARING CUPS
- WRENCHES
- INSTALLER - 5050A
CAUTION: The cooler bypass valve must be replaced if transaxle
failure has
occur ...
 Schematics and diagrams
40/41TE - WITH VARIABLE LINE PRESSURE
Fig. 181: Identifying Line Pressure - Park & Neutral
Fig. 182: Identifying Line Pressure - Reverse
Fig. 183: Identifying Line Pressure - First Gear ( ...
See also:
Diagnosis and Testing
LAMPS/LIGHTING - EXTERIOR
WARNING: To avoid serious or fatal injury on vehicles equipped
with airbags, disable
the Supplemental Restraint System (SRS) before attempting any steering
...
Description, Operation
DESCRIPTION
POWERTRAIN CONTROL MODULE (PCM)
The Powertrain Control Module (PCM) is a digital computer containing a
microprocessor. The PCM receives
input signals from various switches and sensors ...
Coolant
Description
ENGINE COOLANT
GAS ENGINES
WARNING: Antifreeze is an ethylene glycol based coolant and is
harmful if swallowed
or inhaled. If swallowed, drink two glasses of water and ind ...
