Dodge Journey: Removal
2.4L
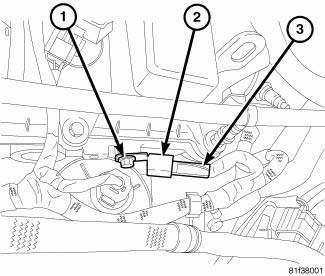
Fig. 3: Capacitor 2.4L
- - Bolt
- - Capacitor
- - Connector
1. Disconnect and isolate negative battery cable at battery.
2. Remove engine cover.
3. Remove electrical connector (3).
4. Remove mounting bolt (1) and ignition capacitor (2).
2.7L 1st
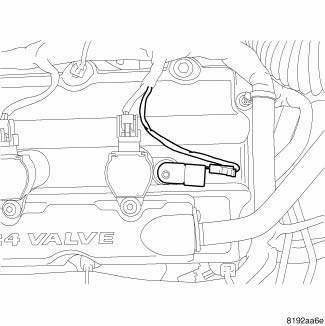
Fig. 4: 1st Ignition Capacitor - 2.7L
1. Disconnect and isolate the negative battery cable.
2. Disconnect the electrical connector.
3. Remove nut and capacitor.
2.7L 2nd
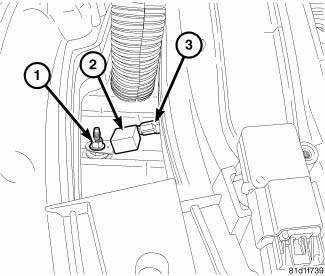
Fig. 5: 2nd Ignition Capacitor - 2.7L
The ignition capacitor is located under the intake manifold on the drivers side of the engine.
1. Disconnect and isolate negative battery cable at battery.
2. Remove electrical connector (3).
3. Remove mounting bolt (1) and ignition capacitor (2).
3.5L
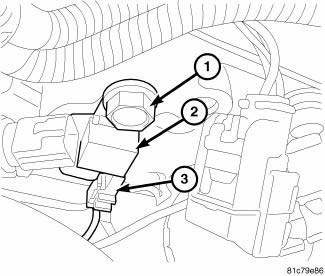
Fig. 6: Ignition Capacitor - 3.5L
The ignition capacitor is located on the drivers side of the engine.
1. Disconnect and isolate negative battery cable at battery.
2. Remove electrical connector (3).
3. Remove mounting bolt (1) and ignition capacitor (2).

 Installation
2.4L
Fig. 7: Capacitor 2.4L
- Bolt
- Capacitor
- Connector
1. Install ignition coil capacitor (2) and bolt (1), tighten bolt to 10 N.m
(88.5 ft. lbs.).
2. Connect electrical connect ...
See also:
ROOF LUGGAGE RACK — IF EQUIPPED
The roof rack cross rails and side rails are designed to
carry cargo weight. The load must not exceed 150 lbs
(68 kg), and it should be distributed uniformly over the
cross rails. In addition, the ...
Non-monitored circuits
The PCM does not monitor all circuits, systems and conditions that could have
malfunctions causing
driveability problems. However, problems with these systems may cause the PCM to
store diagnosti ...
Switch, backup lamp
DESCRIPTION
Fig. 43: Backup Lamp Switch
Vehicles equipped with a manual transmission (2) have a normally open,
spring-loaded plunger type backup
lamp switch (1). Vehicles with an optional elect ...
