Dodge Journey: CHILL ZONE BEVERAGE COOLER STORAGE COMPARTMENT
The Chill Zone Beverage Cooler Storage Compartment can keep chilled beverages cool depending on ambient temperature and climate control setting. Chill Zone is intended for nonperishable beverages only.
The Chill Zone compartment is located on the passenger side of the instrument panel above the glove compartment.
The beverage retainer inside the cooler is designed to hold up to two 12 oz (0.35L) cans when placed horizontally in the retainer. The beverage retainer is removable to allow for storage of other items in the compartment when not in use as a beverage cooler.
Beverage Cooler/Storage Compartment
Press and release the button on the door to open it. the large door will swing upward to allow easy access to the compartment contents.
Chill Zone Beverage Cooler Operation
The blower speed setting on the climate control sets the rate at which the air flows into the compartment. The airflow control valve inside the compartment determines how much air flows into the compartment. Turning the valve rearward increases the airflow, while turning the valve forward decreases the airflow. Turning the valve all the way forward will turn off the airflow into the compartment.

Airflow Control Valve
The compartment cools when the airflow is open, the engine is running and the Air Conditioning (A/C) is on or the Automatic Temperature Control (ATC) system is set for automatic operation (if equipped). This allows you to cool the compartment when the climate control is in the cooling or heating mode.
NOTE: Whether operating a Manual Heating and A/C system or operating an ATC system in the manual mode, the A/C indicator must be ON to cool the compartment.
 STORAGE
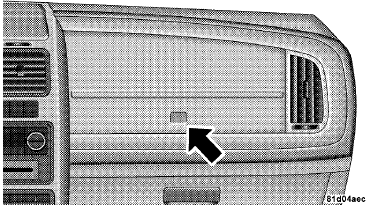
Instrument Panel Storage Compartment — If
Equipped
Press and release the button on the door to open it. The
door swings upward to allow easy access to the compartment.
Instrument Panel Storage ...
 CARGO AREA FEATURES
Rechargeable Flashlight — If Equipped
The rechargeable LED flashlight stores in its charging
station in the left rear quarter trim panel. To remove it,
press on the indent on the side of the flas ...
See also:
Standard procedure, Cleaning, Inspection
Standard procedure
BATTERY RECONNECTION
NOTE: This reconnection procedure is to be performed anytime the
battery has been
disconnected.
1. Connect the negative battery cable remote termin ...
Installation
CLUTCH - FIXED DISPLACEMENT A/C COMPRESSOR
NOTE: Typical A/C compressor and clutch assembly shown in
illustrations.
Fig. 214: Clutch Coil & Snap Ring
1. Align the dowel pin on the bac ...
Uconnect™ Phone — IF EQUIPPED
Refer to “Uconnect™ Phone” in the Uconnect™ User
Manual located on the DVD for further details. ...
