
Dodge Journey: Cooler and lines, oil
Description
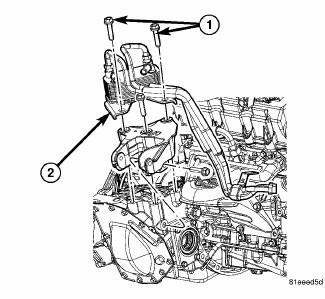
Fig. 250: Oil Cooler Fasteners
Some 2.7L engines may be equipped with an engine oil cooler (2) that is mounted to the rear transmission mount bracket. Oil lines route oil from the engine block to the cooler, which is connected to the engine cooling system.
Removal
WARNING: If the engine is at or near normal operating temperature, the coolant is hot enough to cause severe burns. Always allow the engine to cool down before removing any cooling system hoses.
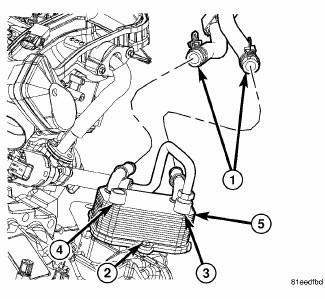
Fig. 251: Heater Hoses From Oil Cooler
1. Disconnect the heater hoses (1) from the oil cooler (5) and clamp them off.
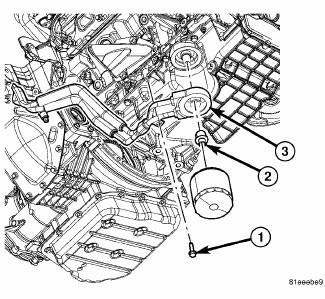
Fig. 252: Cooler Line Retaining Bracket Fastener
2. Remove the oil filter.
3. Remove the oil filter adapter (2).
4. Remove the cooler line retaining bracket fastener (1).
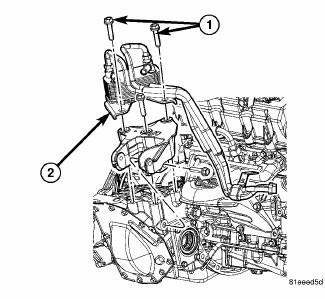
Fig. 253: Oil Cooler Fasteners
5. Remove the oil cooler fasteners (1) and remove the oil cooler assembly (2).
Installation
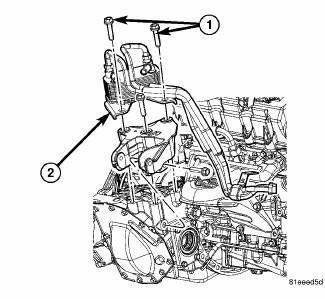
Fig. 254: Oil Cooler Fasteners
1. Install the oil cooler (2) and install the fasteners (1). Tighten to 65 Nm (48 ft. lbs).
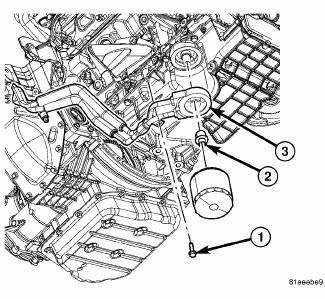
Fig. 255: Cooler Line Retaining Bracket Fastener
2. Install the oil cooler diverter (3) and install the oil filter adapter (2).
3. Reposition the oil line retaining bracket, and install the fastener (1). Tighten to 23 Nm (17 ft. lbs.).
4. Install the oil filter.
5. Top off the cooling system as necessary.
 Description, Operation, Diagnosis and Testing
DESCRIPTION
The lubrication system is a full-flow filtration, pressure feed type. The oil
pump body is mounted to the engine
block. The pump inner rotor is driven by the crankshaft. A structural w ...
 Filter, engine oil
Removal
Fig. 256: Oil Filter & Drain Plug
1. Raise vehicle on hoist.
2. Position a suitable collecting container under oil filter location.
3. Remove oil filter (2) using a suitable oil ...
See also:
Description, Operation
DESCRIPTION
There are two unique park brake switches used on this vehicle, depending upon
whether the vehicle has a foot-operated or hand-operated park brake lever
mechanism.
FOOT-OPERATED
Fi ...
Description, Operation
DESCRIPTION
There are two different batteries available for this vehicle. Vehicles
equipped with a diesel engine utilize a
spiral cell battery with recombination technology. This is a maintenance- ...
Removal
Fig. 25: Outer C/V Joint Seal Boot Clamps
- SMALL CLAMP
- SEALING BOOT
- OUTER CV JOINT HOUSING
- LARGE CLAMP
- INTERCONNECTING SHAFT
1. Remove halfshaft assembly requiring boot repla ...
