Dodge Journey: Intermediate shaft, gas
REMOVAL
2.4L
1. Remove the right half shaft.
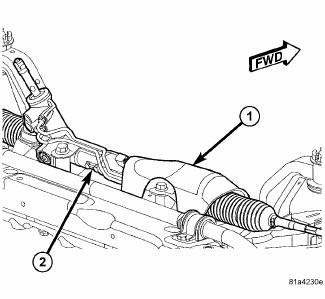
Fig. 44: Intermediate Shaft - 2.4L
2. Remove the three intermediate shaft bolts (1).
3. Remove the intermediate shaft (2).
2.7L
1. Remove the right half shaft.
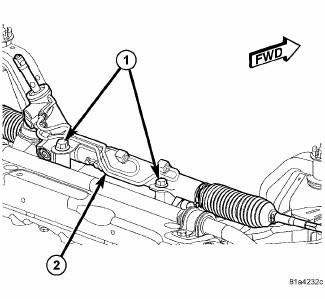
Fig. 45: Identifying Intermediate Shaft, Heat Shield & Bolts
2. Remove the heat shield bolts (2).
3. Remove the heat shield (3).
4. Remove the intermediate shaft bolts (1) and (5).
5. Remove the intermediate shaft (4).
3.5L
1. Remove the right half shaft.
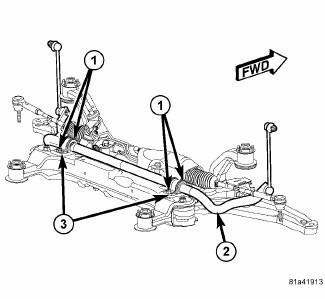
Fig. 46: 3.5L Right Half Shaft Components
2. Remove the intermediate shaft bolts (1).
3. Remove the heat shield bolts (2).
4. Remove the heat shield (3).
5. Remove the intermediate shaft (4).
INSTALLATION
2.4L
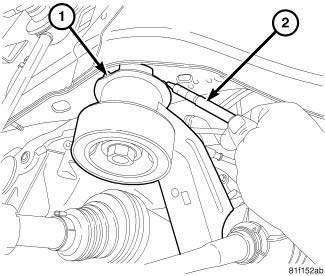
Fig. 47: Intermediate Shaft - 2.4L
1. Install the intermediate shaft (2).
2. Install the three intermediate shaft bolts (1).
3. Install the right half shaft.
2.7L

Fig. 48: Identifying Intermediate Shaft, Heat Shield & Bolts
1. Install the intermediate shaft (4).
2. Install the intermediate shaft bolts (1) and (5). Tighten bolt (1) to 38 Nm (28 ft. lb.) and bolts (5) to 23 Nm (17 ft. lb.).
3. Install the heat shield (3).
4. Install the heat shield bolts (2).
5. Install the right half shaft.
3.5L
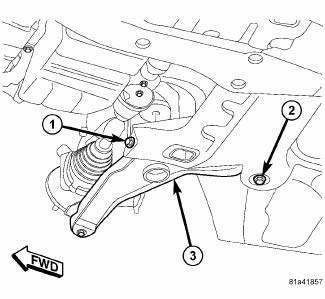
Fig. 49: 3.5L Right Half Shaft Components
1. Install the intermediate shaft (4).
2. Install the intermediate shaft bolts (1) and tighten to 38 Nm (28 ft. lb.).
3. Install the heat shield (3).
4. Install the heat shield bolts (2) and tighten to 10 Nm (7 ft. lb).
5. Install the right half shaft.
 Installation
Fig. 40: Seal Protector
- HALFSHAFT
- SEAL PROTECTOR
1. Install halfshaft to hub/bearing assembly. Install hub nut and washer but
do not tighten at this time.
2. Using Seal Protector 9 ...
 Intermediate shaft, diesel
REMOVAL
2.0L DIESEL
1. Remove the right half shaft.
Fig. 50: 2.0L Diesel Right Half Shaft Components
2. Remove the two intermediate shaft bolts (1).
3. Remove the intermediate shaft (2).
...
See also:
Schematics and diagrams
40/41TE - WITH VARIABLE LINE PRESSURE
Fig. 181: Identifying Line Pressure - Park & Neutral
Fig. 182: Identifying Line Pressure - Reverse
Fig. 183: Identifying Line Pressure - First Gear ( ...
LIFTGATE
The liftgate can be unlocked or locked with the Remote
Keyless Entry (RKE) transmitter or by activating the
power door lock switch located on either front door trim
panel.
NOTE: The liftgate canno ...
Removal
1. Raise and support vehicle.
NOTE: Perform 2 through 5 on each side of vehicle to complete pad set
removal.
Fig. 124: TIRE AND WHEEL MOUNTING
2. Remove wheel mounting nuts (3), then tire ...
