Dodge Journey: Disassembly
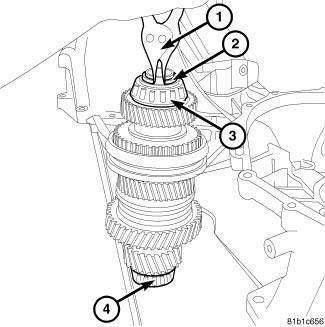
Fig. 229: Snap Ring At Output Shaft
1. Using Snap Ring Pliers (1) remove the snap ring (2) from the output shaft # 2.
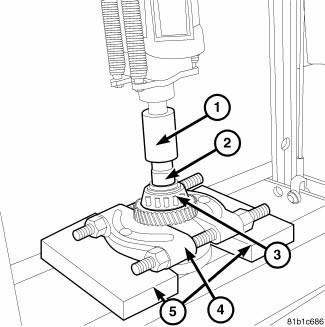
Fig. 230: Bearing From Cluster Shaft
2. Using a press, blocks, Bearing Splitter P-334 and an appropriate spacer (2) press sixth gear and case side bearing (3) from shaft.
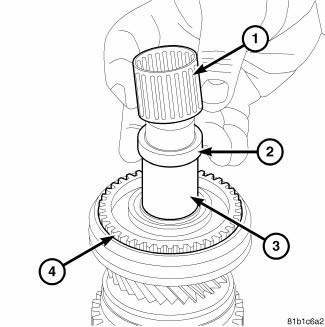
Fig. 231: Bearing Cage & Spacer Cluster
3. Remove sixth needle bearing cage (1) and spacer (2) from output shaft # 2 (3).
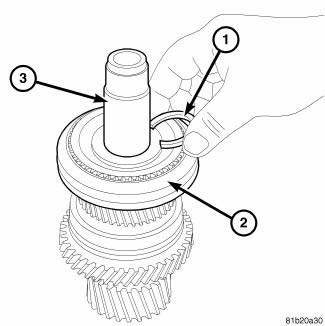
Fig. 232: Snap Ring At Output Shaft #2
4. Remove the snap ring (1) from the output shaft # 2 (3).
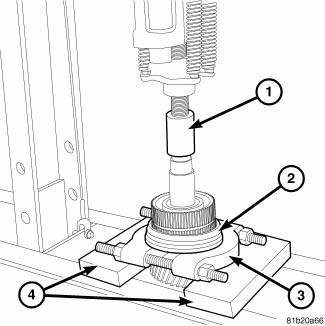
Fig. 233: Fifth Gear & Five/Six Synchronizer
5. Use Bearing Splitter P-334 (3), Blocks (4) and a press remove fifth gear and five/six synchronizer (2).
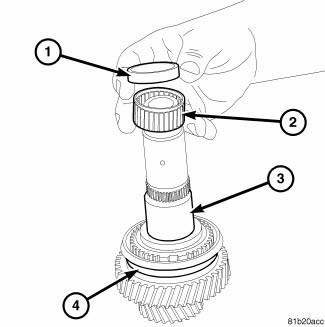
Fig. 234: #2 Bearing & Spacer
6. Remove fifth needle bearing cage (2) and spacer (1) from output shaft (3).

Fig. 235: Output Shaft & C-Clip
7. Remove the C-clip (1) from the output shaft (3).
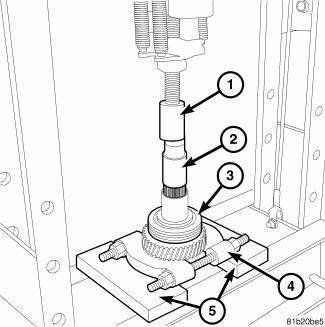
Fig. 236: Output Shaft #2 & Reverse Synchronizer
8. Use Bearing Splitter P-334 (4), Blocks (5) and a press to remove reverse gear and reverse synchronizer (3) from the output shaft # 2.
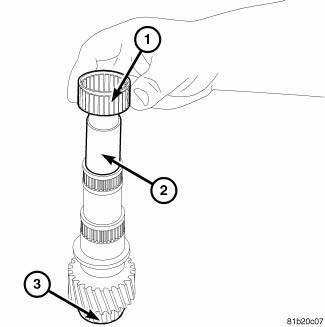
Fig. 237: Output Shaft #2 & Needle Bearing
9. Remove the reverse needle bearing (1) from the output shaft # 2 (2).
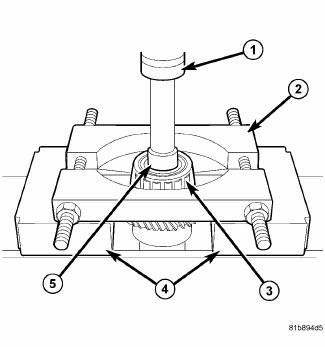
Fig. 238: Output Shaft & Bellhousing Side Bearing
10. Using a Press (1) and Splitter 1130 (2) to remove the bellhousing side bearing (3) from the output shaft # 2(5).

 Assembly
Fig. 239: Output Shaft #2 & Needle Bearing
1. Install the reverse needle bearing (1) onto the output shaft # 2 (2).
Fig. 240: Synchronizer
NOTE: Pay attention to the direction when inser ...
See also:
Description, Operation
DESCRIPTION
The A/C refrigerant lines and hoses are used to carry the refrigerant between
the various A/C system
components. The refrigerant lines and hoses for the R-134a A/C system consist of
...
ONBOARD DIAGNOSTIC SYSTEM — OBD II
Your vehicle is equipped with a sophisticated Onboard
Diagnostic system called OBD II. This system monitors
the performance of the emissions, engine, and automatic
transmission control systems. Whe ...
Frame
SPECIFICATIONS
FRAME DIMENSIONS
Frame dimensions are listed in metric scale. All dimensions are from center
to center of Principal Locating
Point (PLP), or from center to center of PLP and fasten ...
