Dodge Journey: Removal, Installation
REMOVAL
WARNING: Disable the airbag system before attempting any steering wheel, steering column, or instrument panel component diagnosis or service. Disconnect and isolate the negative battery (ground) cable, then wait two minutes for the airbag system capacitor to discharge before performing further diagnosis or service. This is the only sure way to disable the airbag system. Failure to take the proper precautions may result in accidental airbag deployment and possible serious or fatal injury.
NOTE: Take the proper precautions to protect the front face of the instrument panel center bezel from cosmetic damage during this service procedure.
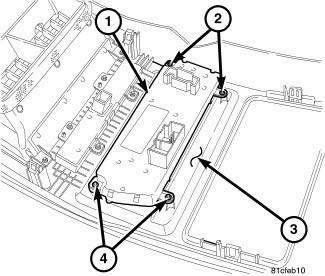
Fig. 25: AC Heater Control Removal/Installation
NOTE: MTC single zone A/C-heater control shown. Other A/C-heater controls similar.
1. Disconnect and isolate the negative battery cable.
2. Remove the center bezel (3) and place it on a workbench.
3. Remove the screws (2 and 4) that secure the A/C-heater control (1) to the back of the center bezel and remove the control.
INSTALLATION

Fig. 26: AC Heater Control Removal/Installation
NOTE: MTC single zone A/C-heater control shown. Other A/C-heater controls similar.
1. Position the A/C-heater control (1) onto the back of the center bezel (3).
2. Install the screws (2 and 4) that secure the A/C-heater control to the center bezel. Tighten the screws to 2 N.m (17 in. lbs.).
3. Install the center bezel.
4. Reconnect the negative battery cable.
NOTE: The A/C-heater control will automatically perform the Actuator Calibration function when the ignition is initially turned on when installing a new control or when reinstalling the original control. However, the Actuator Calibration function must be manually initiated using a scan tool if the A/C-heater control has been previously installed in another vehicle.
5. If required, initiate the Actuator Calibration function using a scan tool.
 Description
MANUAL TEMPERATURE CONTROL (MTC) SINGLE ZONE
The A/C-heater control for the front Manual Temperature Control (MTC) single
zone system allows one
temperature setting for the entire vehicle. All con ...
 Module, power, front blower motor
DESCRIPTION
Fig. 27: Blower Mtr Pwr Module
A blower motor power module is used on this model when equipped with the
automatic temperature control (ATC) heating-A/C system. Models equipped with t ...
See also:
Installation
Two unique brake lamp switches are used in this vehicle, depending upon
whether the vehicle was built during
early or late production. These switches are not interchangeable. Both switches
are il ...
POWER INVERTER — IF EQUIPPED
Your vehicle may be equipped with a 115 Volt AC (150
Watt maximum) power outlet located on the back of the
center console. This outlet can power cellular phones,
electronics and other low power dev ...
VEHICLE MODIFICATIONS/ALTERATIONS
WARNING:
Any modifications or alterations to this vehicle could
seriously affect its roadworthiness and safety and
may lead to an accident resulting in serious injury or
death. ...
