Dodge Journey: Removal
2.4L
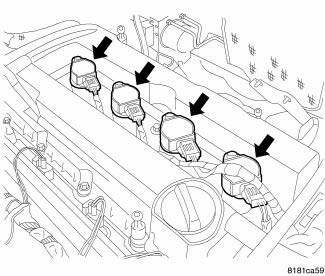
Fig. 11: Identifying Ignition Coil Electrical Connectors
NOTE: Prior to removing coil, spray compressed air around coil top to make sure no dirt drops into the spark plug tube.
The electronic ignition coil attaches directly to the valve cover.
1. Disconnect and isolate the negative battery cable.
2. Remove engine cover.
3. Disconnect electrical connector from ignition coil.
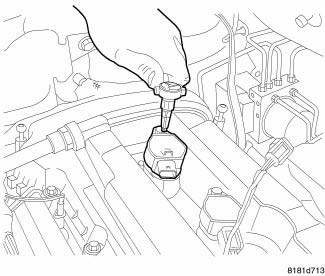
Fig. 12: Removing/Installing Ignition Coil Mounting Bolts
4. Remove ignition coil mounting bolts.
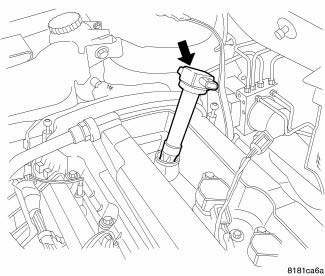
Fig. 13: Removing/Installing Ignition Coil
5. Twist the ignition coil then pull straight up.
2.7L
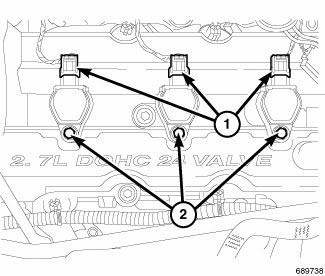
Fig. 14: Removing/Installing Electrical Connectors And Mounting Bolts At
Ignition Coil
NOTE: Always remove the ignition coil assembly by turning the assembly 1/2 turn and pulling up in a steady motion.
1. Disconnect the negative battery cable.
2. Remove the upper intake manifold.
3. Disconnect electrical connector (1) from ignition coil.
4. Remove mounting bolt (2) from ignition coil.
CAUTION: Prior to removing the ignition coils, spray compressed air around the coils and spark plugs. If dirt and debris enter the engine, this may cause internal engine damage.
5. Remove the ignition coils.
3.5L
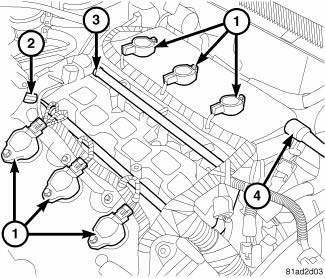
Fig. 15: Ignition Coils And Fuel Rail
1. Remove engine cover.
2. Disconnect and isolate the negative battery cable.
3. Remove the upper intake manifold.
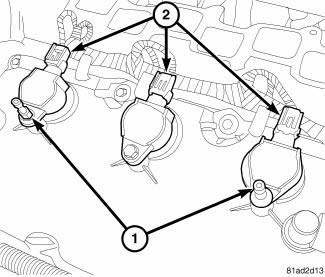
Fig. 16: Ignition Coils
4. Unlock and disconnect electrical connector (2) from ignition coils.
5. Remove mounting bolts and engine cover studs (1).
CAUTION: Prior to removing the ignition coils, spray compressed air around the coils and spark plugs. If dirt and debris enter the engine, this may cause internal engine damage.
6. Twist, lift and remove ignition coil from engine.
 Coil, ignition
...
 Installation
2.4L
Fig. 17: Removing/Installing Ignition Coil
1. Install ignition coil onto spark plug.
Fig. 18: Removing/Installing Ignition Coil Mounting Bolts
2. Install ignition coil mounting bolt, tigh ...
See also:
Description
MANUAL TEMPERATURE CONTROL (MTC) SINGLE ZONE
The A/C-heater control for the front Manual Temperature Control (MTC) single
zone system allows one
temperature setting for the entire vehicle. All con ...
Removal
1. Raise and support vehicle.
NOTE: Perform 2 through 5 on each side of vehicle to complete pad set
removal.
Fig. 124: TIRE AND WHEEL MOUNTING
2. Remove wheel mounting nuts (3), then tire ...
AUTOSTICK — IF EQUIPPED
AutoStick is a driver-interactive transmission that offers
six manual ratio changes to provide you with more
control of the vehicle. AutoStick allows you to maximize
engine braking, eliminate undes ...
