Dodge Journey: Removal
1. Remove the engine cover.
2. Release fuel pressure.
3. Disconnect negative battery cable.
4. Drain cooling system.
5. Evacuate the A/C system using a suitable refrigerant recovery machine.
6. Remove throttle body air inlet hose and air cleaner housing assembly.
7. Raise vehicle on hoist.
8. Remove both front wheels.
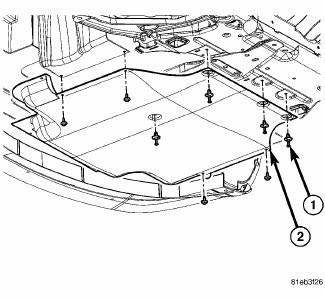
Fig. 7: Belly Pan
- - Belly Pan Fasteners
- - Belly Pan
9. Remove fasteners (1), and remove the belly pan (2).
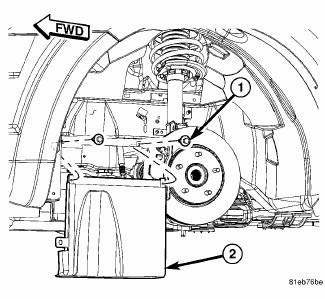
Fig. 8: Left Lower Splash Shield
10. Remove the left lower splash shield (2).
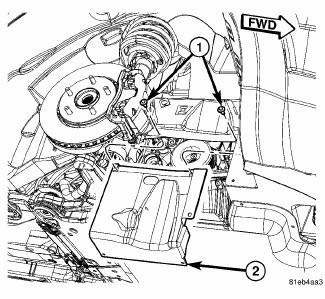
Fig. 9: Right Lower Splash Shield
11. Remove the right lower splash shield (2).
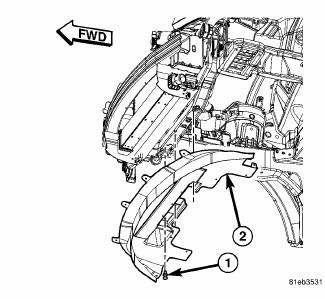
Fig. 10: Lower Fascia Closeout Panel
12. Remove the lower fascia closeout panel (2).
13. Lower vehicle.
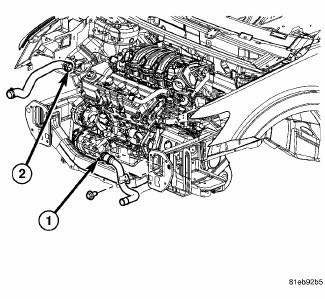
Fig. 11: Upper/Lower Radiator Hoses
14. Disconnect upper (2) and lower (1) radiator hoses at the thermostat housing and at the water pump fitting.
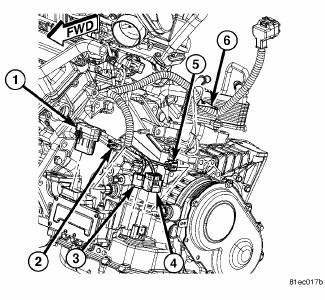
Fig. 12: Transmission Control Module Harness Connector
15. Disconnect transmission control module harness connector (1).
16. Disconnect transmission solenoid harness connectors (3) and (4).
17. Disconnect transmission input shaft speed sensor (2) and the output shaft speed sensor (5).
18. Disconnect transmission shift cable.
19. Disconnect the transaxle oil cooler lines at the transaxle.
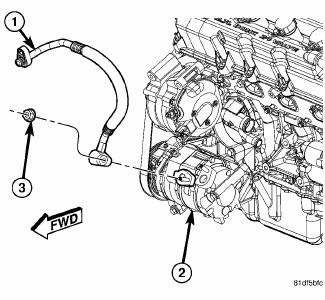
Fig. 13: A/C Discharge Line At Compressor
20. Disconnect A/C discharge line (1) at compressor (2).
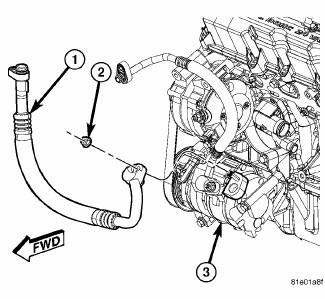
Fig. 14: A/C Compressor To Bracket
21. Disconnect A/C suction line (1) at compressor (2).
22. Remove the A/C compressor (3).
23. Remove cooling fan assembly.
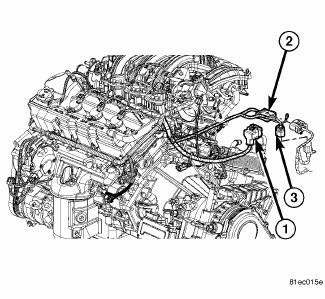
Fig. 15: Engine Electrical Harnesses Connectors
24. Disconnect engine electrical harnesses connectors (1), (2) and (3).
25. Raise vehicle.
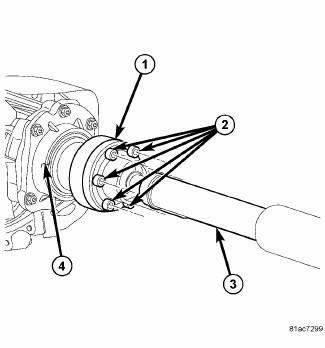
Fig. 16: Propeller Shaft To PTU Fasteners
26. If equipped with AWD, remove the propeller shaft to PTU fasteners (2).
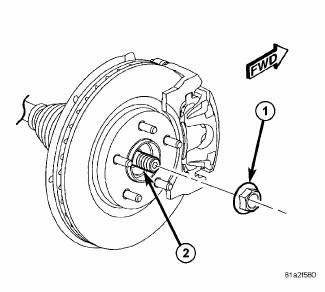
Fig. 17: Axle Shafts Hub Nut
27. Remove both axle shafts (2).
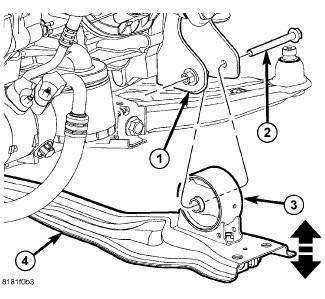
Fig. 18: Front Engine Mount Through Bolt
28. Remove front engine mount through bolt (2).
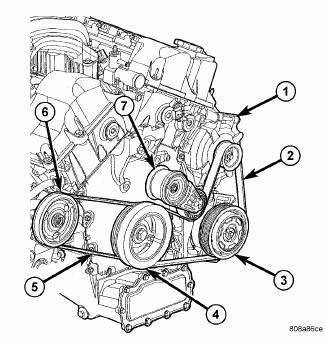
Fig. 19: Accessory Drive Belt System - 2.7L
- - GENERATOR
- - IDLER/TENSIONER
29. Remove accessory drive belts (2) and (5).
30. Remove power steering pump and bracket as an assembly. Do not disconnect power steering lines from pump. Reposition pump and support with suitable retaining strap.
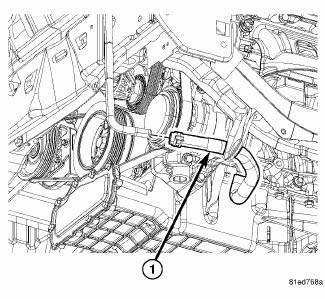
Fig. 20: Heater Return Hose
31. Disconnect heater return hose (1) from pipe connection at right front frame rail area.
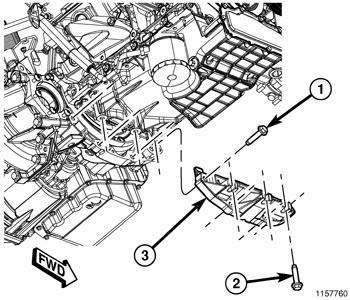
Fig. 21: Structural Collar
32. Remove structural collar (3).
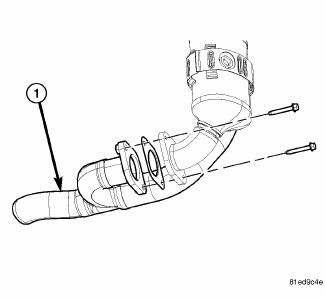
Fig. 22: Exhaust Cross-Under Pipe
33. Remove the exhaust cross-under pipe (1).
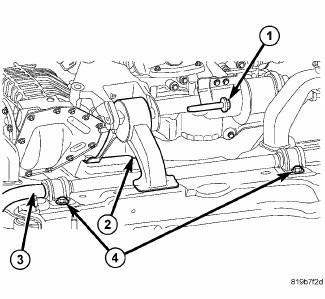
Fig. 23: Rear Engine Mount & Transaxle Bracket
34. Remove rear engine mount and transaxle bracket (2).
35. Drain engine oil.
36. Remove transaxle torque converter housing cover.
37. Mark flex plate to torque converter position. Remove torque converter bolts.
38. Lower vehicle.
39. Disconnect positive cable from battery and TIPM.
40. Disconnect ground cable from left side transaxle mount bracket.
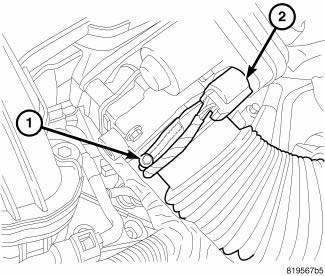
Fig. 24: Electronic Throttle Control Harness Connector
41. Disconnect ETC harness connector (1) from throttle body.
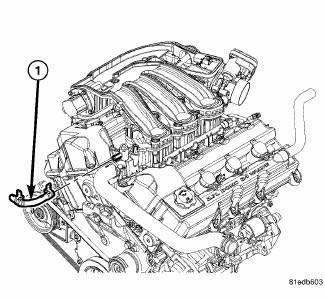
Fig. 25: Coolant Pressure Bottle Coolant Hose
42. Disconnect coolant pressure bottle coolant hose (1) from engine coolant outlet connector.
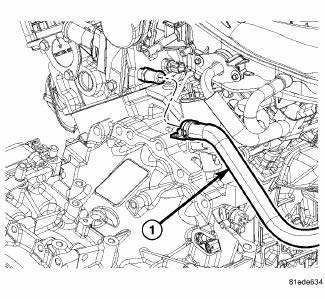
Fig. 26: Heater Hose From Engine Coolant Outlet
43. Disconnect heater hose (1) from engine coolant outlet below the ETC.
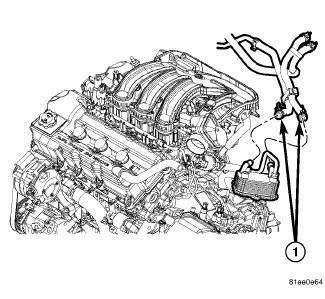
Fig. 27: Oil Cooler Lines
44. If equipped, disconnect the oil cooler lines (1) from the engine oil cooler.
45. Disconnect ground strap at right shock tower.
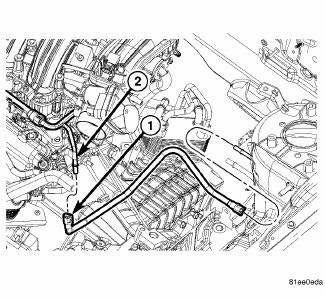
Fig. 28: Fuel Line From Fuel Rail Inlet
46. Disconnect fuel line (1) from fuel rail inlet (2).
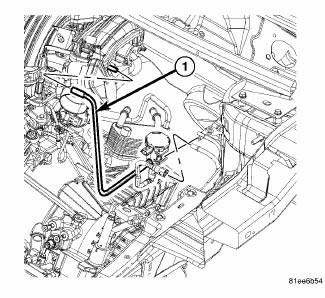
Fig. 29: Vapor Purge Vacuum Hose
47. Disconnect vapor purge vacuum hose (1).
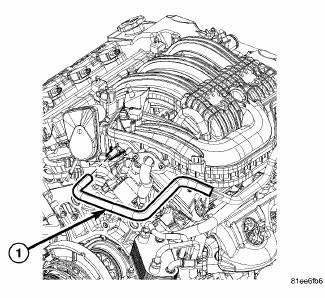
Fig. 30: Brake Booster Vacuum Hose
48. Disconnect brake booster vacuum hose (1).
49. Disconnect all ground straps attaching to engine.
50. Position vehicle height to allow engine dolly 6135 and cradle 6710A with posts 6848 to be installed under vehicle.
51. Loosen cradle engine mounts to allow movement for positioning onto engine locating holes on the engine block, compressor mount bracket and oil pan rail. Lower vehicle and position cradle until the engine is resting on posts. Tighten post mounts to cradle frame to prevent movement when removing or installing engine/transaxle assembly. Secure engine/transaxle assembly to dolly/cradle with safety straps.
52. Lower vehicle so weight of the engine and transmission ONLY is on the cradle.
53. Remove right and left side engine mount bolts.
54. Slowly raise vehicle in short length spans. Inspect at each interval for potential engine or transaxle contact to vehicle components. Move the cradle/dolly fixture as necessary to allow for removal clearance.
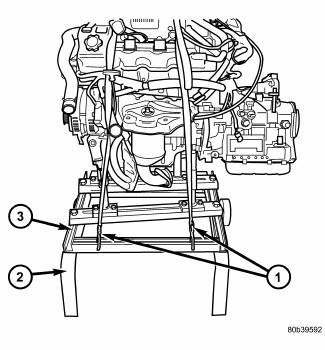
Fig. 31: ENGINE REMOVAL CRADLE
- - SAFETY STRAPS
- - SPECIAL TOOL 6135
- - SPECIAL TOOL 6710
 Standard procedure
ENGINE GASKET SURFACE PREPARATION
Fig. 4: PROPER TOOL USAGE FOR SURFACE PREPARATION
To ensure engine gasket sealing, proper surface preparation must be
performed, especially with the use of
alu ...
 Installation
Fig. 32: Brake Booster Vacuum Hose
1. Position engine/transaxle assembly under vehicle and slowly lower vehicle
in short length spans. Inspect
at each interval for potential engine or transaxle ...
See also:
Removal
Fig. 431: Identifying Battery Cables
- BATTERY POSITIVE CABLE
- THERMO-WRAP
- BATTERY NEGATIVE CABLE
NOTE: If valve body is replaced or reconditioned, the PCM Quick Learn
Procedure
...
Lens, instrument cluster
REMOVAL
Fig. 8: Instrument Cluster Lens Locking Tabs
1. Remove instrument cluster from vehicle. See Removal .
2. Separate the lens from the cluster by gently prying on the locking clips (1)
a ...
Heater, engine block
Description
2.4L
Fig. 70: BLOCK HEATER 2.4L ENGINE
- RETAINING CLIP
- BLOCK HEATER
CAUTION: The power cord must be secured in its retainer clips, and
not positioned
so it co ...
