Dodge Journey: Seal, output flange
REMOVAL
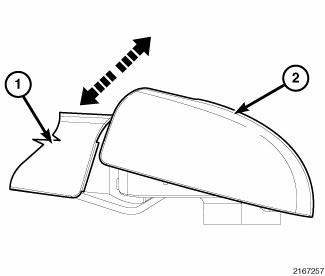
Fig. 93: Axle Seal Removal
- - SEAL
- - SCREWDRIVER
1. Raise vehicle on hoist.
2. Remove rear driveline module.
3. Use suitable screwdriver (2) to remove output seal (1).
INSTALLATION
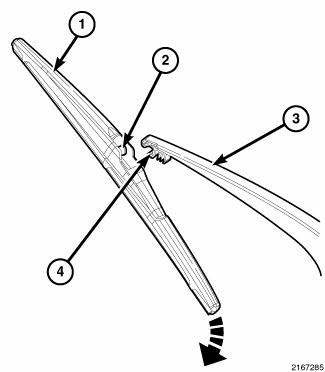
Fig. 94: Axle Seal Installation
- - HANDLE C-4171
- - INSTALLER 8493
1. Install output flange seal to differential housing using handle C- 4171A (1) and installer 8493 (2).
2. Install rear driveline module.
3. Check differential assembly fluid level and adjust as required.
 Seal, input flange
REMOVAL
Fig. 80: Removing /Installing Propeller Shaft
NOTE: Rubber coupler is part of the propeller shaft assembly. Removing
coupler from
propeller shaft will result in vibration/balance i ...
 Electronically controlled clutch
REMOVAL
NOTE: Rubber coupler is part of the propeller shaft assembly. Removing
coupler from
propeller shaft will result in vibration/balance issues.
Fig. 95: Removing /Installing Propell ...
See also:
Switch, remote radio
DESCRIPTION
Remote radio control switches are rocker-type switch units are mounted in the
upper spoke covers of the rear
(instrument panel side) steering wheel trim cover. The switch unit on the l ...
Removal
WARNING: Refer to the applicable warnings and cautions for this
system before
performing the following operation. Failure to follow these instructions
may result in serious or fatal ...
Description - monitored systems
There are new electronic circuit monitors that check fuel, emission, engine
and ignition performance. These
monitors use information from various sensor circuits to indicate the overall
operation ...
