Dodge Journey: Disassembly
NOTE: Cleanliness through entire disassembly and assembly of the valve body cannot be overemphasized. When disassembling, each part should be washed in a suitable solvent, then dried by compressed air. Do not wipe parts with shop towels. All mating surfaces in the valve body are accurately machined; therefore, careful handling of all parts must be exercised to avoid nicks or burrs.
NOTE: If valve body assembly is being reconditioned, the PCM/TCM Quick Learn Procedure must be performed.
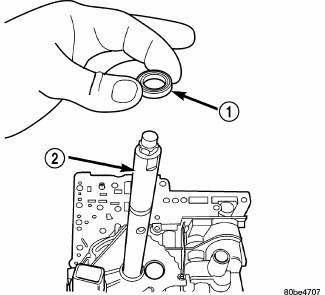
Fig. 446: Removing/Installing Manual Shaft Seal
- - SEAL
- - MANUAL SHAFT
1. Remove manual shaft seal (1).
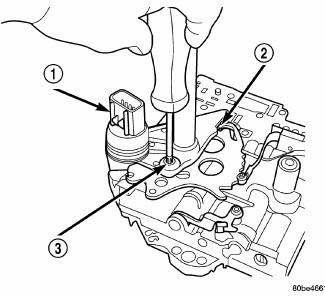
Fig. 447: Removing/Installing Transmission Range Sensor
- - TRANSMISSION RANGE SENSOR
- - MANUAL VALVE CONTROL PIN
- - RETAINING SCREW
2. Remove Transmission Range Sensor retaining screw (3).
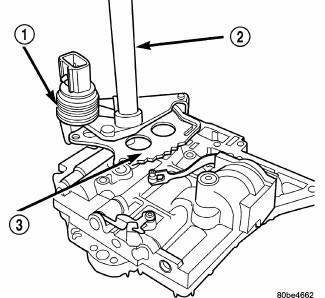
Fig. 448: Removing/Installing Manual Shaft/Rooster Comb & Transmission Range
Sensor
- - TRANSMISSION RANGE SENSOR
- - MANUAL SHAFT / ROOSTER COMB
- - ROOSTER COMB
3. Remove Manual Shaft/Rooster Comb (3) and Transmission Range Sensor (1).
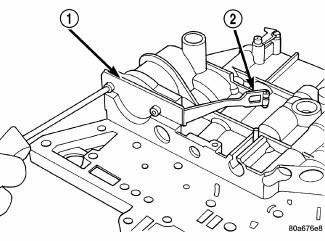
Fig. 449: Removing/Installing 2/4 Accumulator Retaining Plate
- - 2-4 ACCUMULATOR RETAINING PLATE
- - DETENT SPRING
4. Remove 2/4 Accumulator Retaining Plate (1).
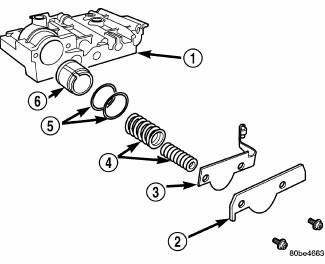
Fig. 450: Identifying 2/4 Accumulator Assembly
- - VALVE BODY
- - RETAINER PLATE
- - DETENT SPRING
- - SPRINGS
- - SEALS
- - PISTON
5. Remove 2/4 Accumulator components (2,3,4,5 and 6).
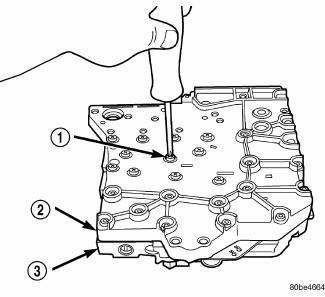
Fig. 451: Identifying Valve Body-To-Transfer Plate Screws
- - SCREW (24)
- - TRANSFER PLATE
- - VALVE BODY
6. Remove Valve Body (3) to Transfer Plate (2) screws (1).
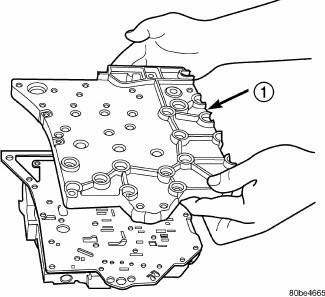
Fig. 452: Removing/Installing Transfer Plate
- - TRANSFER PLATE
7. Invert assembly and remove Transfer Plate (1). Beware of loose check balls.
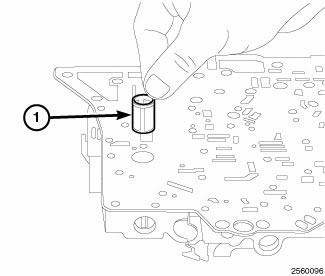
Fig. 453: Identifying Oil Screen
8. Remove oil screen (1).
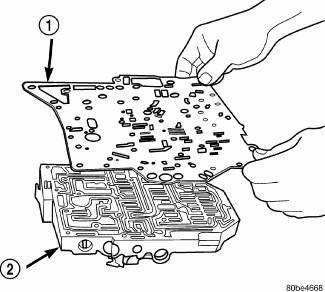
Fig. 454: Removing/Installing Separator Plate
- - SEPARATOR PLATE
- - VALVE BODY
9. Remove separator plate (1).
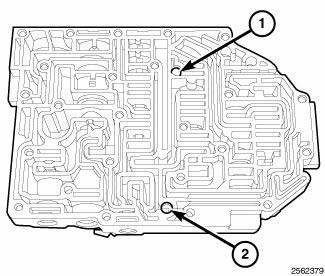
Fig. 455: Identifying Valve Body Check Balls
- - (#4) REVERSE CHECK BALL
- - (#3 ) L/R CHECK BALL
10. Remove valve body check balls (1 and 2). Note their location for assembly ease.
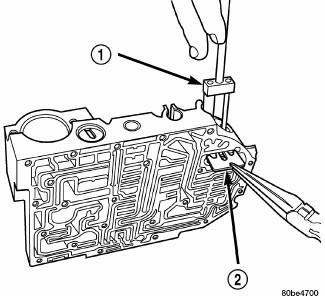
Fig. 456: Removing/Installing Dual Retainer Plate
- - REMOVER/INSTALLER 6301
- - RETAINER
NOTE: Tag all valve/spring assemblies for reassembly identification.
11. Remove dual retainer plate (2) using Remover/Installer 6301(1).
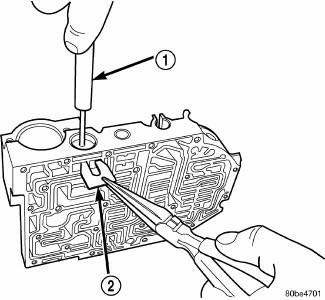
Fig. 457: Removing/Installing Regulator Valve Spring Retainer
- - REMOVER/INSTALLER 6302
- - RETAINER
12. Remove regulator valve spring retainer (2) using Remover/Installer 6302 (1).
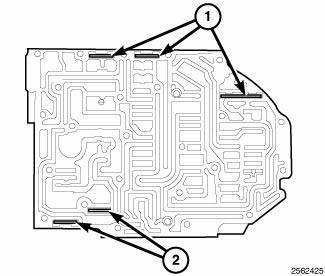
Fig. 458: Removing/Installing Valve Retainers
- - RETAINER
- - RETAINER
13. Remove retainers (1and 2).
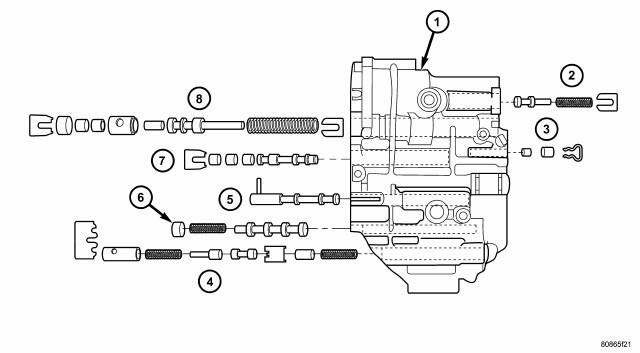
Fig. 459: Identifying Valve Body Assembly
- - VALVE BODY
- - T/C REGULATOR VALVE
- - L/R SWITCH VALVE
- - CONVERTER CLUTCH CONTROL VALVE
- - MANUAL VALVE
- - CONVERTER CLUTCH SWITCH VALVE
- - SOLENOID SWITCH VALVE
- - REGULATOR VALVE
14. Remove valves and springs.
 Removal
Fig. 431: Identifying Battery Cables
- BATTERY POSITIVE CABLE
- THERMO-WRAP
- BATTERY NEGATIVE CABLE
NOTE: If valve body is replaced or reconditioned, the PCM Quick Learn
Procedure
...
 Assembly
NOTE: Cleanliness through entire disassembly and assembly of the valve
body cannot
be overemphasized. When disassembling, each part should be washed in a
suitable solvent, then dried by comp ...
See also:
Installation
CAUTION: To prevent damage to the plastic evaporator tube bracket,
carefully guide
the heater core tubes past the bracket during installation of the heater
core.
Fig. 278: Re ...
Description, Operation
DESCRIPTION
Fig. 297: Identifying Solenoid/Pressure Switch Assembly
- SOLENOID AND PRESSURE SWITCH ASSEMBLY
The Solenoid/Pressure Switch Assembly (1) is external to the transaxle and
mount ...
CD/DVD DISC MAINTENANCE
To keep a CD/DVD in good condition, take the following
precautions:
1. Handle the disc by its edge; avoid touching the
surface.
2. If the disc is stained, clean the surface with a soft cloth,
wip ...
