
Dodge Journey: Assembly
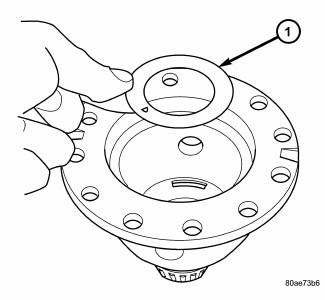
Fig. 333: Identifying Thrust Washer
- - THRUST WASHER
NOTE: The differential is serviced as an assembly. Differential service is limited to bearing cups and cones. Any other differential component failure must be remedied by differential assembly and transfer shaft replacement.
1. Install side gear thrust washer to differential case.
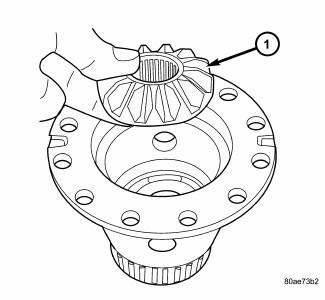
Fig. 334: Identifying Side Gear
- - DIFFERENTIAL SIDE GEAR
2. Install side gear to differential case.
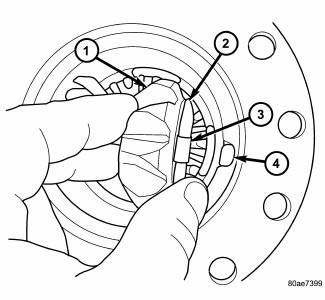
Fig. 335: Identifying Pinion Gear & Washer
- - PINION GEAR
- - TABBED WASHER
- - LOCATING TAB
- - NOTCH
3. Install both pinion gears and washers to case, while orientating washer tabs to notch in case.
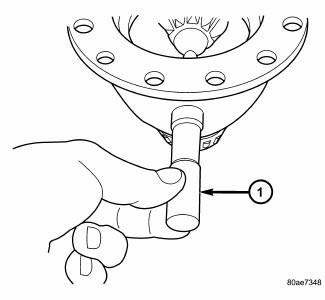
Fig. 336: Identifying Pinion Shaft
- - PINION SHAFT
4. Install pinion shaft.
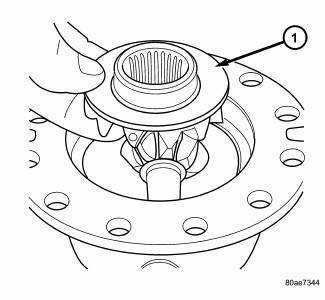
Fig. 337: Identifying Side Gear
- - DIFFERENTIAL SIDE GEAR
5. Install side gear to case.
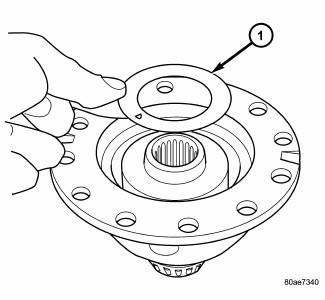
Fig. 338: Identifying Side Gear Thrust Washer
- - SIDE GEAR THRUST WASHER
6. Install side gear thrust washer to case.
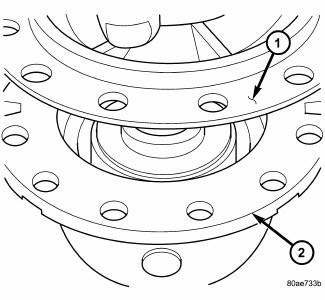
Fig. 339: Identifying Differential Support
- - DIFFERENTIAL SUPPORT
- - DIFFERENTIAL CASE
7. Install differential support into position, while aligning through-holes.
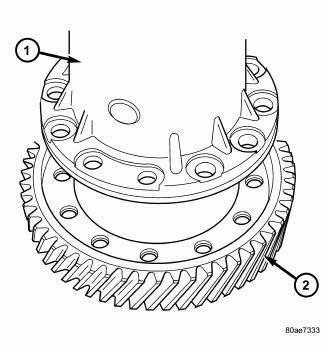
Fig. 340: Identifying Differential Ring Gear
- - DIFFERENTIAL CASE
- - RING GEAR
8. Install differential ring gear to case.
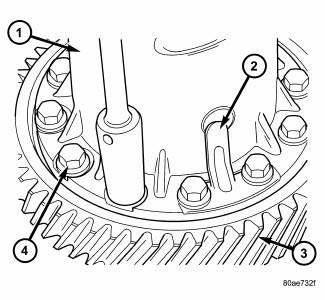
Fig. 341: Identifying Ring Gear-To-Case Bolts & Pinion Shaft Retainers
- - DIFFERENTIAL CASE
- - PINION SHAFT RETAINER
- - RING GEAR
- - RING GEAR-TO-CASE BOLT
9. Install ring gear-to-case bolts, with pinion shaft retainers, and torque bolts to 95 N.m (70 ft. lbs.).
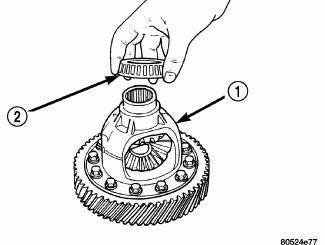
Fig. 342: Installing Differential Bearing To Differential (Extension Housing
Side)
- - DIFFERENTIAL ASSEMBLY
- - DIFFERENTIAL BEARING
10. Using Miller Special Tool L-4410, and C-4171, install differential bearing to differential (extension housing side).
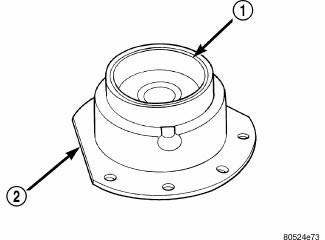
Fig. 343: Removing/Installing Differential Bearing & Bearing Race
- - DIFFERENTIAL BEARING CUP
- - DIFFERENTIAL BEARING RETAINER
11. Using Miller Special Tool 5052 and C-4171, install differential bearing to differential (bearing retainer side).
12. Using Miller Special Tool 6061 and C-4171, install differential bearing race to bearing retainer.
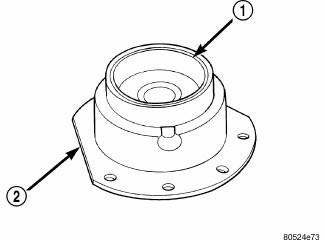
Fig. 344: Removing/Installing Differential Bearing & Bearing Race
- - DIFFERENTIAL BEARING CUP
- - DIFFERENTIAL BEARING RETAINER
13. Using Miller Special Tool L-4520 and C-4171, install differential bearing to extension housing.
NOTE: Use Mopar Silicone Rubber Adhesive Sealant, or equivalent, on retainer and extension housing/adapter plate to seal to case.
14. Install differential assembly into transaxle case. Install differential bearing retainer.
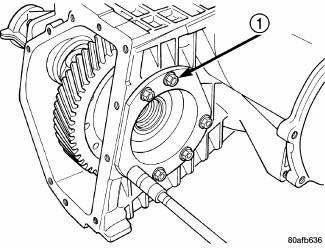
Fig. 345: Removing/Installing Differential Bearing Retainer Bolts
- - DIFFERENTIAL RETAINER BOLTS
15. Torque retainer-to-case bolts to 28 N.m (21 ft. lbs.).
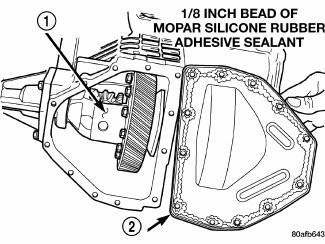
Fig. 346: Identifying Differential Cover
- - DIFFERENTIAL ASSEMBLY
- - DIFFERENTIAL COVER
16. Apply a bead of Mopar Silicone Rubber Adhesive Sealant to extension housing/adapter plate and install into position. Install and torque bolts to 28 N.m (21 ft. lbs.).
17. Measure and adjust differential bearing preload. 18. Apply a bead of Mopar Silicone Rubber Adhesive Sealant to differential cover and install to case.
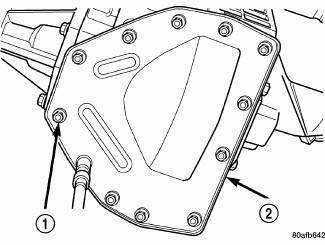
Fig. 347: Removing/Installing Differential Cover Bolts
- - DIFFERENTIAL COVER BOLTS
- - DIFFERENTIAL COVER
19. Install and torque cover-to-case bolts to 19 N.m (165 in. lbs.).
 Disassembly
Fig. 314: Removing/Installing Differential Cover Bolts
- DIFFERENTIAL COVER BOLTS
- DIFFERENTIAL COVER
NOTE: The transfer shaft should be removed for differential repair and
bearing t ...
 Adjustments
NOTE: Perform all differential bearing preload measurements with the
transfer shaft
and gear removed.
DIFFERENTIAL BEARING PRELOAD ADJUSTMENT USING EXISTING SHIM
Fig. 348: Installing Too ...
See also:
Removal
2.0L TURBO DIESEL
Fig. 2: Generator Cables
1. Remove engine cover.
2. Disconnect and isolate the negative battery cable.
3. Remove accessory drive belt.
4. Disconnect battery cable fro ...
Installation
LEFT-HAND-DRIVE
NOTE: The master cylinder must be bled before installing it on the
vehicle.
1. Bench bleed the master cylinder.
2. Wipe the face of the power brake booster clean where the ...
Lines, A/C underbody, extension
Description
Fig. 310: Underbody A/C Extension Lines Description
Models equipped with the rear heating-A/C system use metal lines attached to
the vehicle underbody to carry
refrigerant and engin ...
