Dodge Journey: Installation
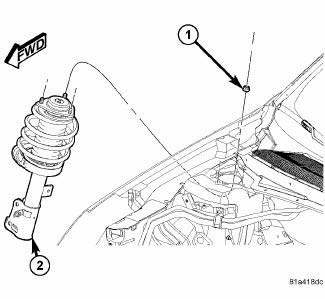
Fig. 97: Strut Upper Mounting Nuts
1. Raise the strut assembly (2) into the strut tower, aligning the three studs on the strut assembly upper mount with the holes in strut tower. Install the three mounting nuts (1) on the studs. Tighten the three nuts to 55 N.m (41 ft. lbs.).
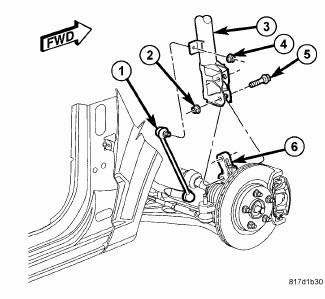
Fig. 98: Strut Mounting To Knuckle
CAUTION: The strut clevis-to-knuckle bolts (5) are serrated and must not be turned during installation. Install the nuts while holding the bolts stationary in the knuckle.
2. Position the lower end of the strut assembly (3) in line with the upper end of the knuckle (6), aligning the mounting holes. Install the two attaching bolts (5). Install the nuts (2). While holding the bolts in place, tighten the nuts to 140 N.m (103 ft. lbs.).
3. Attach the stabilizer bar link (1) to the strut (3). Install and tighten the nut (4) while holding the stabilizer bar link stud stationary. Tighten the nut to 48 N.m (35 ft. lbs.).
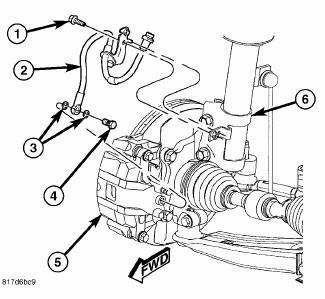
Fig. 99: Brake Hose Mounting To Strut
4. Secure the flex hose (2) routing bracket to the strut (6) with the mounting screw (1). Tighten the mounting screw to 13 N.m (120 in. lbs.).
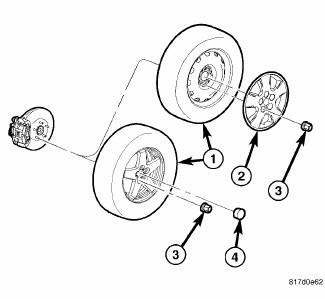
Fig. 100: TIRE AND WHEEL MOUNTING
5. Install tire and wheel assembly (1). Install and tighten wheel mounting nuts (3) to 135 N.m (100 ft. lbs.).
6. Lower the vehicle.
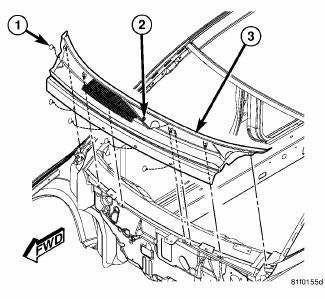
Fig. 101: Cowl Screen
7. Install the cowl screen. Install the push-pins (1) securing the cowl screen to the wheelhouse brace and cowl. Rotate the screw (2) in the center of the cowl screen 90º counterclockwise to lock the screen in place.
8. Install the wiper arms.
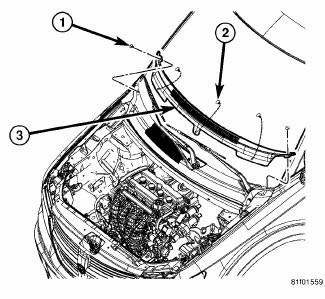
Fig. 102: Cowl Top Screen
9. Install the cowl top screen (3). Install the two push-pins (1) securing the cowl top screen at the ends.
Install the remaining push-pins (2).
10. Install the engine appearance cover.
 Assembly
NOTE: If the coil spring has been removed from the spring compressor,
proceed with
the next step, otherwise, proceed with 3.
NOTE: To determine the flat coil end of the coil spring for the ...
 Wheel alignment
...
See also:
Description
Fig. 90: HVAC housing assembly
NOTE: LHD model shown RHD model similar.
All models are equipped with a common HVAC housing assembly that combines A/C
and heating capabilities
into a single ...
Installation
CAUTION: Be certain to adjust the refrigerant oil level when
servicing the A/C
refrigerant system. Failure to properly adjust the refrigerant
oil level will prevent the A/C system fro ...
JUMP-STARTING
If your vehicle has a discharged battery it can be jumpstarted
using a set of jumper cables and a battery in
another vehicle or by using a portable battery booster
pack. Jump-starting can be danger ...
