Dodge Journey: Inspection, adjustments
INSPECTION
Inspect the exhaust pipes, catalytic converters, muffler, and resonators for cracked joints, broken welds and corrosion damage that would result in a leaking exhaust system. Inspect the clamps, support brackets, and insulators for cracks and corrosion damage.
ADJUSTMENTS
A misaligned exhaust system is usually indicated by a vibration, rattling noise, or binding of exhaust system components. These noises are sometimes hard to distinguish from other chassis noises. Inspect exhaust system for broken or loose clamps, heat shields, isolators, and brackets. Replace or tighten as necessary. It is important that exhaust system clearances and alignment be maintained.
Perform the following procedures to align the exhaust system:
1. Loosen clamps and support brackets.
2. Align the exhaust system starting at the front, working rearward.
3. Tighten all clamps and brackets once alignment and clearances are achieved.
SPECIFICATIONS
TORQUE


SPECIAL TOOLS
EXHAUST SYSTEM
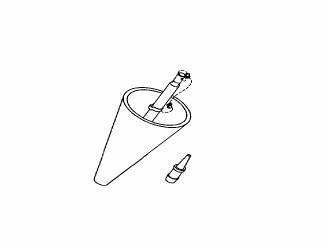
Fig. 3: Exhaust Cone Tool - 8404-ECT
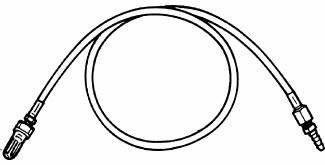
Fig. 4: Back Pressure Test Adapter - CH8519
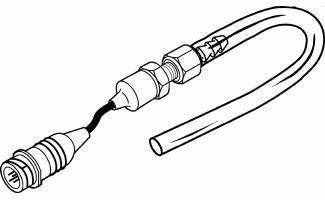
Fig. 5: Pressure Transducer CH7063
 Diagnosis and testing
EXCESSIVE EXHAUST SYSTEM NOISE
CONDITION
POSSIBLE
CAUSES
CORRECTION
EXCESSIVE EXHAUST NOISE
(UNDER HOOD)
1. Exhaust manifold cracked or
broken.2. Manifold to cyl ...
 Converter, catalytic
DESCRIPTION
WARNING: The normal operating temperature of the exhaust system is
very high.
Therefore, never work around or attempt to service any part of the
exhaust system until it ...
See also:
Installation
LEFT-HAND-DRIVE
Fig. 140: PEDAL AND BOOSTER MOUNTING - LHD
1. Carefully install the brake pedal and bracket assembly (1) in the vehicle
lining up the bracket with the
power brake booster mounti ...
Cover(s), engine timing
Removal
Fig. 349: FRONT SPLASH SHIELDS
1. Disconnect and isolate negative battery cable.
2. Drain cooling system.
3. Remove coolant pressure container.
4. Remove right front wheel and bel ...
Synchronizer
DISASSEMBLY
Place synchronizer in a clean shop towel and wrap. Press on inner hub.
Carefully open up shop towel and
remove springs, balls, keys, hub, and sleeve.
CLEANING
Do not attempt to clean ...
