Dodge Journey: Insulator, engine mount, front
Removal
1. Raise vehicle.
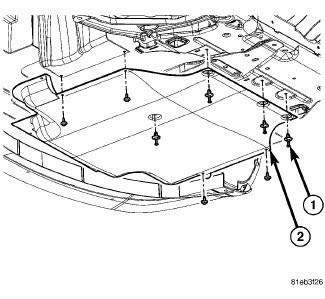
Fig. 222: Belly Pan
- - belly pan fasteners
- - belly pan
2. Remove the belly pan (2).
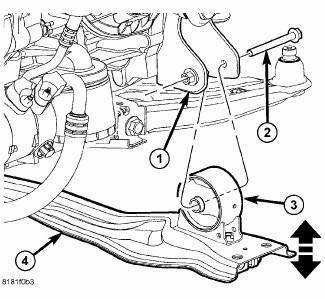
Fig. 223: Front Engine Mount Through Bolt
3. Remove front mount to bracket horizontal through bolt (2).
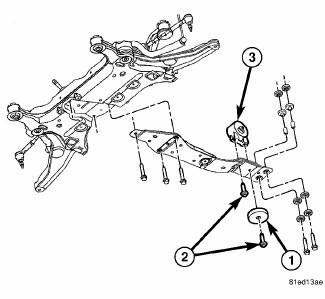
Fig. 224: Front Mount Vertical Bolts
4. Remove front mount vertical bolts (2).
5. Remove front mount (3).
Installation
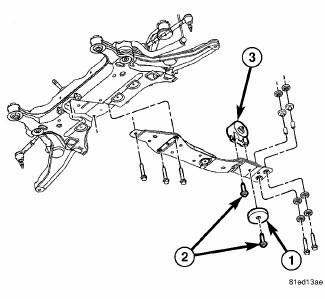
Fig. 225: Front Mount Vertical Bolts
1. Install the front mount (3).
2. Install the front mount vertical bolts (2).
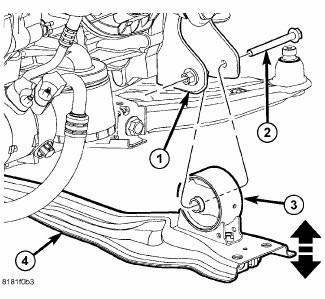
Fig. 226: Front Engine Mount Through Bolt
3. Install the front mount to bracket horizontal through bolt (2).
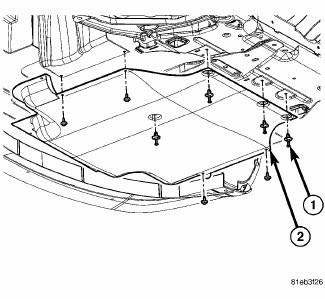
Fig. 227: Belly Pan
- - belly pan fasteners
- - belly pan
4. Install the belly pan (2).
 Adjustments
ADJUSTMENT
The right and left support assemblies are slotted to allow for right/left
drive train adjustment in relation to drive
shaft assembly length.
Check and reposition right and left engin ...
 Insulator, engine mount, left
Removal
Fig. 228: Belly Pan
1. Disconnect and isolate the negative battery cable.
2. Remove throttle body air inlet hose and air cleaner housing assembly.
3. Remove the belly pan (2).
...
See also:
Removal
Fig. 10: Identifying Battery Cables
NOTE: If transaxle assembly is being replaced or overhauled (clutch
and/or seal
replacement), it is necessary to perform the "Quick-Learn" Proc ...
VEHICLE IDENTIFICATION NUMBER
The Vehicle Identification Number (VIN) is on the left
front corner of the instrument panel and is visible from
outside of the vehicle through the windshield. This
number also appears on the Automo ...
Removal
Fig. 60: Support Module With Jack
- DRIVELINE MODULE
- TRANSMISSION JACK
NOTE: Rear suspension and drivetrain design require this procedure to
be performed
on a "drive-on" ...
