Dodge Journey: Fascia, front lower, closeout
REMOVAL

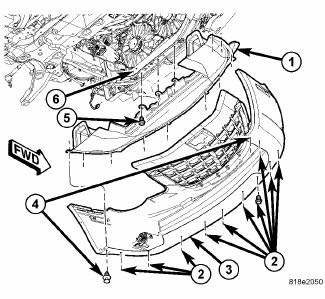
Fig. 11: Lower Fascia
1. Remove fasteners (5) to lower closeout.

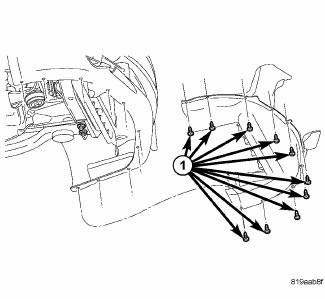
Fig. 12: Push Pins - Front Lower Fascia
2. Remove push pins (1) to lower closeout.
3. Remove the front lower fascia.
INSTALLATION

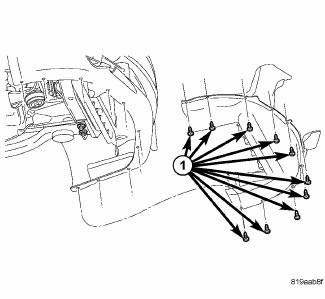
Fig. 13: Push Pins - Front Lower Fascia
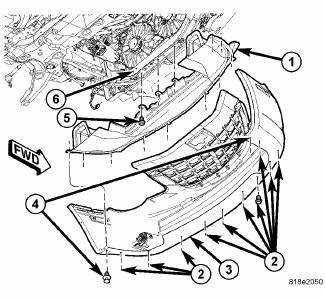
1. Install the front lower fascia.
2. Install the push pins (1) to lower closeout.

Fig. 14: Lower Fascia
 Fascia, front
REMOVAL
Fig. 1: Pushpins
1. Release hood latch and open hood.
2. Remove the pushpins for the fascia (2) at the radiator support.
Fig. 2: Pop Rivets
3. Hoist and support vehicle on safety st ...
 Fascia, rear
REMOVAL
Fig. 15: Push Pins
1. Open the hatch.
2. Remove the 6 pushpins (1) securing the fascia (2).
Fig. 16: Rivets
3. Remove the rivets (2) and the Torx screw (3) around the wheel well for ...
See also:
Valve, exhaust gas recirculation (EGR), 2.0L Diesel
Description
The EGR valve is mounted to the intake manifold.
Operation
The engines use Exhaust Gas Recirculation (EGR) systems. The EGR system
reduces oxides of nitrogen (NOx)
in engine exhaust ...
Diagnosis and Testing
ELECTRIC BACKLIGHT (EBL) SYSTEM
NOTE: Illumination of the defogger switch indicator lamp does not
necessarily mean
that electrical current is reaching the rear window glass and/or the outside ...
Removal
WITH FOOT LEVER
1. Release the parking brake.
2. Raise and support the vehicle.
3. Manually release the parking brake cable tension.
Fig. 186: PARKING BRAKE CABLE EQUALIZER
4. Collapse t ...
