Dodge Journey: Rocker arm, valve
DESCRIPTION

Fig. 133: Rocker Arm
- - LASH ADJUSTER POCKET
- - OIL SQUIRT HOLE
- - ROLLER
The rocker arms are composed of steel stamping with an integral roller bearing. The rocker arms incorporate a 0.5 mm (0.0197 in.) oil hole in the lash adjuster socket for roller/camshaft lobe lubrication.
REMOVAL

Fig. 134: Cylinder Head Cover Fasteners
- - DOUBLE ENDED STUDS
- - BOLTS
1. Remove cylinder head cover(s).
CAUTION: Always rotate engine by turning the crankshaft. Failure to do so will result in valve and/or piston damage.
2. Rotate engine until the cam lobe is on its base circle (heel), on the rocker arm being removed.

Fig. 135: Rocker Arm - Removal/Installation
- - SPECIAL TOOL 8215A
- - SPECIAL TOOL 8216A
- - 3/8" DRIVE RATCHET
CAUTION: Depress valve spring only enough to remove rocker arm.
3. Using Special Tools 8215A (1) and 8216A (2) Adaptor, depress valve spring only enough to release tension on rocker arm.
4. Remove rocker arm from cylinder head.
CAUTION: If rocker arms are to be reused, identify position of rocker arms for reassembly in their original positions.
5. Repeat procedure for each rocker arm removed.
6. Inspect the rocker arm for wear or damage.
INSPECTION
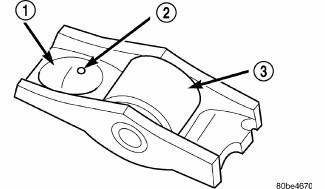
Fig. 136: Rocker Arm
- - LASH ADJUSTER POCKET
- - OIL SQUIRT HOLE
- - ROLLER
Inspect the cam follower assembly for wear or damage. Replace as necessary.
INSTALLATION
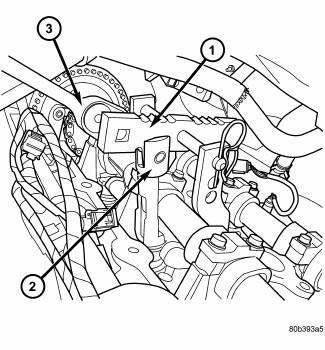
Fig. 137: Rocker Arm - Removal/Installation
- - SPECIAL TOOL 8215A
- - SPECIAL TOOL 8216A
- - 3/8" DRIVE RATCHET
1. Lubricate rocker arms with clean engine oil before installation.
2. Rotate engine until cam lobe is on its base circle (heel) of rocker arm being installed.
3. Using Special Tools 8215A (1) and 8216A Adaptor, depress valve spring only enough to install rocker arm.
4. Install rocker arm in original position (if reused) over valve and lash adjuster. Release tension on valve spring.
NOTE: Inspect rocker arm for proper engagement into lash adjuster and valve tip.
5. Repeat procedure for each rocker arm being installed.
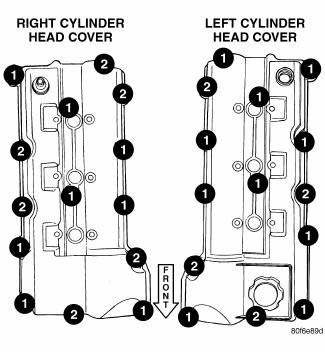
Fig. 138: Cylinder Head Cover Fasteners
- - DOUBLE ENDED STUDS
- - BOLTS
6. Install cylinder head cover(s).
 Lifter(s), hydraulic
Diagnosis and Testing
DIAGNOSIS AND TESTING - HYDRAULIC LASH ADJUSTER NOISE DIAGNOSIS
Proper noise diagnosis is essential in locating the source of a NVH
complaint. Locating a lash adjuster (tappe ...
 Seal(s), valve guide
REMOVAL
Fig. 139: Valve Stem Seal-Removal/Installation
- VALVE SEAL TOOL
- VALVE STEM
1. Remove valve spring.
2. Remove valve stem seal by using a valve seal tool.
INSTALLATION
Fig. ...
See also:
Non-monitored circuits
The PCM does not monitor all circuits, systems and conditions that could have
malfunctions causing
driveability problems. However, problems with these systems may cause the PCM to
store diagnosti ...
FLUIDS, LUBRICANTS, AND GENUINE PARTS
Engine
Chassis ...
Removal, Installation
REMOVAL
1. Remove transmission and torque converter from vehicle.
2. Place a suitable drain pan under the converter housing end of the
transmission.
CAUTION: Verify that transmission is ...
