Dodge Journey: Accumulator
DESCRIPTION

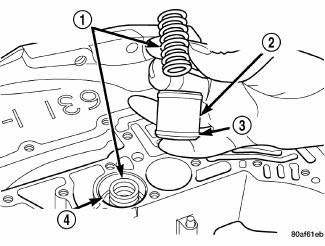
Fig. 238: Identifying Underdrive & Overdrive Accumulators
- - RETURN SPRING
- - UNDERDRIVE CLUTCH ACCUMULATOR
- - SEAL RING (2)
- - OVERDRIVE CLUTCH ACCUMULATOR
The 41TE underdrive, overdrive, low/reverse, and 2/4 clutch hydraulic circuits each contain an accumulator. An accumulator typically consists of a piston (2), seal rings (3) return spring(s) (1) and a cover or plug. The overdrive and underdrive accumulators are located within the transaxle case, and are retained by the valve body.

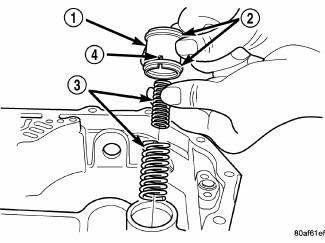
Fig. 239: Removing/Installing Low/Reverse Accumulator Return Springs
- - ACCUMULATOR PISTON
- - SEAL RINGS
- - RETURN SPRINGS
- - (NOTE NOTCH)
The low reverse accumulator (1) is also located within the transaxle case, but the assembly is retained by a cover and a snap-ring.

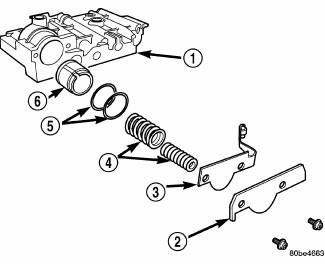
Fig. 240: Identifying 2/4 Accumulator Assembly
- - VALVE BODY
- - RETAINER PLATE
- - DETENT SPRING
- - VALVE BODY
- - RETAINER PLATE
- - DETENT SPRING
The 2/4 accumulator is located in the valve body (1) . It is retained by a cover and retaining screws.
OPERATION
The function of an accumulator is to cushion the application of a frictional clutch element. When pressurized fluid is applied to a clutch circuit, the application force is dampened by fluid collecting in the respective accumulator chamber against the piston and spring(s). The intended result is a smooth, firm clutch application
 Schematics and diagrams
40/41TE - WITH VARIABLE LINE PRESSURE
Fig. 181: Identifying Line Pressure - Park & Neutral
Fig. 182: Identifying Line Pressure - Reverse
Fig. 183: Identifying Line Pressure - First Gear ( ...
See also:
Description
Fig. 253: Upper Suction/Liquid Line Assembly
NOTE: A/C Suction line for 2.7L engine shown. Other engines similar.
The A/C suction line carries refrigerant from the A/C expansion valve to the ...
Module, steering column
DESCRIPTION
Fig. 47: Steering Control Module
This vehicle is equipped with a Steering Control Module (SCM) that is
internal to the left multi-function switch
housing (2). The left (lighting) mu ...
Electronically controlled clutch
REMOVAL
NOTE: Rubber coupler is part of the propeller shaft assembly. Removing
coupler from
propeller shaft will result in vibration/balance issues.
Fig. 95: Removing /Installing Propell ...

