Dodge Journey: Insulator, engine mount, front
Removal
1. Raise vehicle.
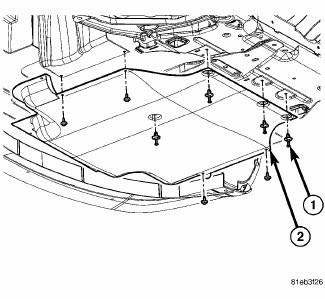
Fig. 222: Belly Pan
- - belly pan fasteners
- - belly pan
2. Remove the belly pan (2).
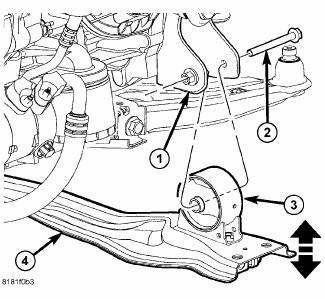
Fig. 223: Front Engine Mount Through Bolt
3. Remove front mount to bracket horizontal through bolt (2).
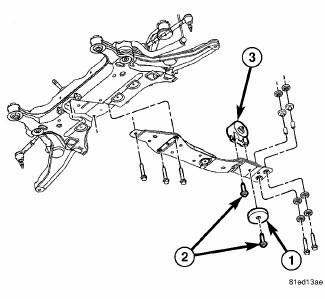
Fig. 224: Front Mount Vertical Bolts
4. Remove front mount vertical bolts (2).
5. Remove front mount (3).
Installation
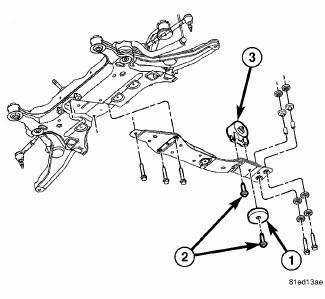
Fig. 225: Front Mount Vertical Bolts
1. Install the front mount (3).
2. Install the front mount vertical bolts (2).
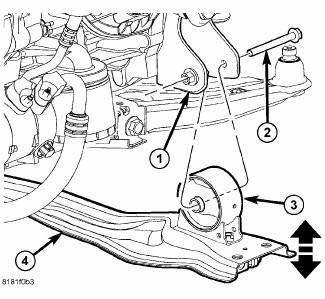
Fig. 226: Front Engine Mount Through Bolt
3. Install the front mount to bracket horizontal through bolt (2).
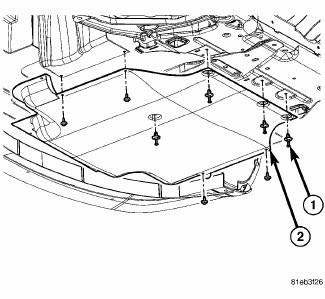
Fig. 227: Belly Pan
- - belly pan fasteners
- - belly pan
4. Install the belly pan (2).
 Adjustments
ADJUSTMENT
The right and left support assemblies are slotted to allow for right/left
drive train adjustment in relation to drive
shaft assembly length.
Check and reposition right and left engin ...
 Insulator, engine mount, left
Removal
Fig. 228: Belly Pan
1. Disconnect and isolate the negative battery cable.
2. Remove throttle body air inlet hose and air cleaner housing assembly.
3. Remove the belly pan (2).
...
See also:
Removal
FRONT
1. Raise and support the vehicle.
Fig. 163: TIRE AND WHEEL MOUNTING
2. Remove the wheel mounting nuts (3), then the tire and wheel assembly (1).
NOTE: In some cases, it may be necessary ...
Description, Operation
DESCRIPTION
A Macpherson type design strut assembly is used in place of the traditional
front suspension upper control arm
and upper ball joint. The bottom of the strut mounts directly to the stee ...
ILLUMINATED ENTRY
The interior lights will turn on when you press the
UNLOCK button on the Remote Keyless Entry (RKE)
transmitter or open a door or the liftgate.
This feature also turns on the approach lighting (if
...
