Dodge Journey: Intermediate shaft, gas
REMOVAL
2.4L
1. Remove the right half shaft.
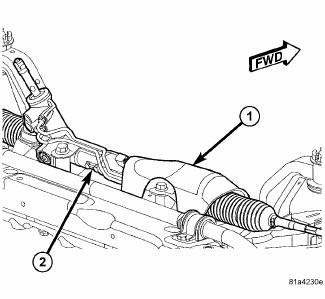
Fig. 44: Intermediate Shaft - 2.4L
2. Remove the three intermediate shaft bolts (1).
3. Remove the intermediate shaft (2).
2.7L
1. Remove the right half shaft.
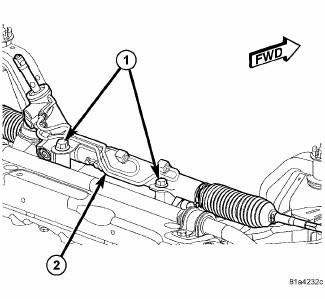
Fig. 45: Identifying Intermediate Shaft, Heat Shield & Bolts
2. Remove the heat shield bolts (2).
3. Remove the heat shield (3).
4. Remove the intermediate shaft bolts (1) and (5).
5. Remove the intermediate shaft (4).
3.5L
1. Remove the right half shaft.
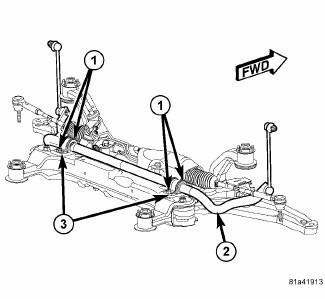
Fig. 46: 3.5L Right Half Shaft Components
2. Remove the intermediate shaft bolts (1).
3. Remove the heat shield bolts (2).
4. Remove the heat shield (3).
5. Remove the intermediate shaft (4).
INSTALLATION
2.4L
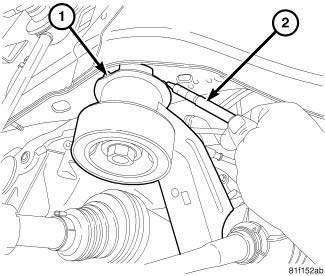
Fig. 47: Intermediate Shaft - 2.4L
1. Install the intermediate shaft (2).
2. Install the three intermediate shaft bolts (1).
3. Install the right half shaft.
2.7L

Fig. 48: Identifying Intermediate Shaft, Heat Shield & Bolts
1. Install the intermediate shaft (4).
2. Install the intermediate shaft bolts (1) and (5). Tighten bolt (1) to 38 Nm (28 ft. lb.) and bolts (5) to 23 Nm (17 ft. lb.).
3. Install the heat shield (3).
4. Install the heat shield bolts (2).
5. Install the right half shaft.
3.5L
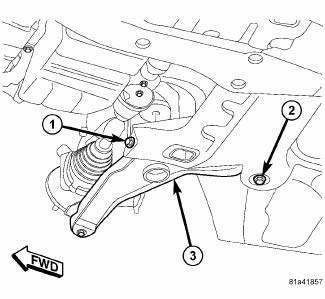
Fig. 49: 3.5L Right Half Shaft Components
1. Install the intermediate shaft (4).
2. Install the intermediate shaft bolts (1) and tighten to 38 Nm (28 ft. lb.).
3. Install the heat shield (3).
4. Install the heat shield bolts (2) and tighten to 10 Nm (7 ft. lb).
5. Install the right half shaft.
 Installation
Fig. 40: Seal Protector
- HALFSHAFT
- SEAL PROTECTOR
1. Install halfshaft to hub/bearing assembly. Install hub nut and washer but
do not tighten at this time.
2. Using Seal Protector 9 ...
 Intermediate shaft, diesel
REMOVAL
2.0L DIESEL
1. Remove the right half shaft.
Fig. 50: 2.0L Diesel Right Half Shaft Components
2. Remove the two intermediate shaft bolts (1).
3. Remove the intermediate shaft (2).
...
See also:
Description, Diagnosis and Testing
DESCRIPTION
This vehicle is equipped with either an equal length halfshaft system,
consisting of short halfshafts on both sides
with an intermediate drive shaft on the right side, or an unequal le ...
Removal
CLUTCH - FIXED DISPLACEMENT A/C COMPRESSOR
WARNING: Refer to the applicable warnings and cautions for this
system before
performing the following operation. Failure to follow the warnin ...
Disassembly
Fig. 200: Snap Ring At Output Shaft Case Bearing
1. Remove the snap ring (2) from the output shaft.
Fig. 201: Output Shaft Case Bearing And Gear
2. Use Bearing Splitter P-334 (3), Cage 8925-3 ( ...
