Dodge Journey: Manifold, exhaust, crossover
Removal
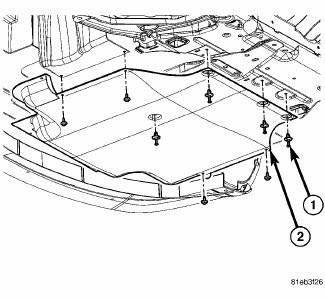
Fig. 287: Belly Pan
- - belly pan fasteners
- - belly pan
1. Remove the belly pan (2).
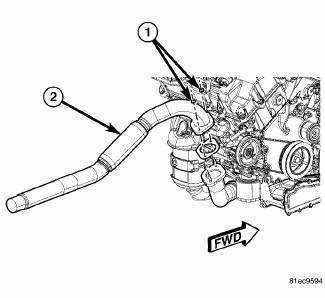
Fig. 288: Exhaust Extension Pipe
2. Remove the fasteners (1), and remove the exhaust extension pipe (2) from the cross under pipe.

Fig. 289: Exhaust Cross-Under Pipe
3. Remove the rear maniverter-to-cross under pipe fasteners (1) and (2).

Fig. 290: Front Maniverter-To-Cross Under Fasteners
4. Remove the front maniverter-to-cross under fasteners (1) and (2), and remove the cross under pipe (3).
Installation

Fig. 291: Front Maniverter-To-Cross Under Fasteners
1. Install the cross under pipe (3). and the front maniverter-to-cross under fasteners (1) and (2). Tighten to 27 Nm (20 ft. lb.).
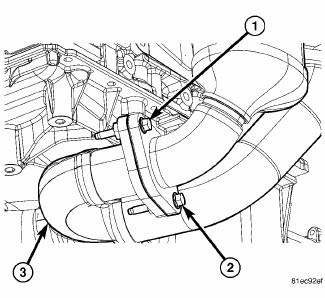
Fig. 292: Exhaust Cross-Under Pipe
2. Install the rear maniverter-to-cross under pipe fasteners (1) and (2). Tighten to 29 Nm (21 ft. lb.).

Fig. 293: Exhaust Extension Pipe
3. Install the exhaust extension pipe (2) to the cross under pipe, and install the fasteners (1). Tighten to 27 Nm (20 ft. lb.)

Fig. 294: Belly Pan
- - belly pan fasteners
- - belly pan
4. Install the belly pan (2).
 Manifolds
...
 Manifold, exhaust, front
Removal
1. Disconnect negative battery cable.
2. Remove the engine cover.
Fig. 295: Oxygen Sensors
3. Disconnect and remove oxygen sensors (2) and (4).
Fig. 296: Upper Maniverter Heat Shiel ...
See also:
Module, heated seat
DESCRIPTION
Fig. 35: Locating Heated Seat Module
The heated seat module (2) is located under the driver front seat. It has a
single electrical connector (1) and a
push pin style retainer that s ...
Assembly
Fig. 214: First Gear Needle Bearing & Output Shaft
NOTE: Use ATF on all parts that are to be assembled in this procedure.
1. Install the first and first gear needle bearing (2) on the out ...
Disassembly
HOUSING-AIR DISTRIBUTION
NOTE: The air distribution housing must be removed from the HVAC
housing and
disassembled for service of the blend-air and mode-air doors.
NOTE: LHD model with A/C ...
