Dodge Journey: Removal
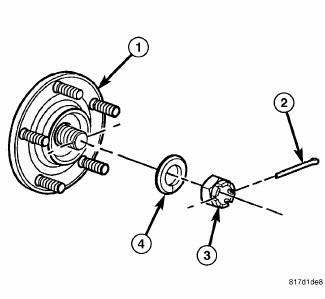
Fig. 60: Support Module With Jack
- - DRIVELINE MODULE
- - TRANSMISSION JACK
NOTE: Rear suspension and drivetrain design require this procedure to be performed on a "drive-on" hoist, as the front and rear suspension needs to be compressed to ride height to facilitate rear halfshaft removal.
1. Make sure transaxle is in Neutral (N) position.
2. Raise vehicle on hoist.
3. Remove exhaust system center hanger (at propeller shaft bearing/support).
4. Disconnect exhaust system at rear-most hanger and lower at least 254 mm (10 in.). Support system with suitable wire or rope.
5. Drain differential lubricant to prevent fluid spillage upon removal.
6. Support driveline module (1) with transmission jack (2) (or equivalent).
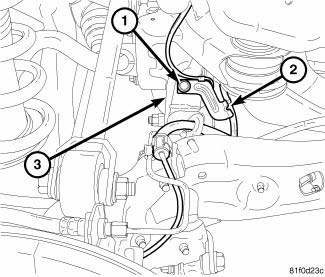
Fig. 61: Removing /Installing Propeller Shaft
7. Apply alignment index marks (4) on the rear axle flange (5) and rubber coupler (1).
8. Remove three rear propeller shaft rubber coupler to rear axle input flange retaining bolts (3).
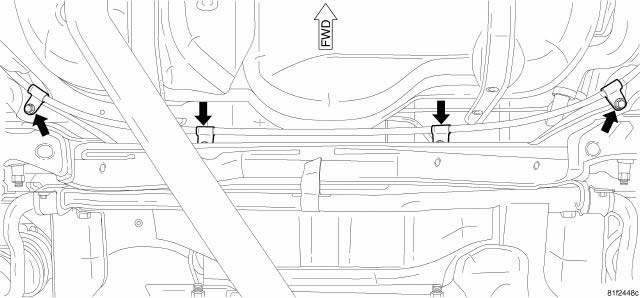
Fig. 62: ECC Electrical Connector
9. Unplug ECC electrical connector.
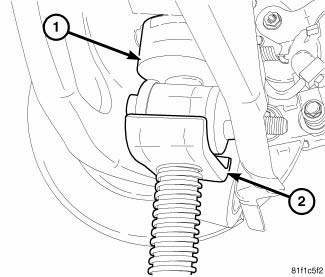
Fig. 63: Seal Protector
- - HALFSHAFT
- - SEAL PROTECTOR
10. Using suitable screwdriver, partially dislodge halfshafts (1) from differential. Install Seal Protector 9099 (2) to protect seal upon disassembly. Clean tool and seal area to prevent debris intrusion.
Fig. 64: RDA To Crossmember Bolts
11. Remove the RDA - to - crossmember mounting bolts (1).
Fig. 65: Rear RDA Module-To-Crossmember Bolt
12. Remove the rear RDA module-to-crossmember bolt (2).
Fig. 66: Secure Propeller Shaft to Exhaust
- - PROPELLER SHAFT
- - EXHAUST SYSTEM
- - STRAP
13. Lower driveline module assembly just enough to facilitate removal of halfshafts from differential. Make sure Seal Protector 9099 engages seal.
14. Disconnect propeller shaft (1) from driveline module and secure to exhaust system (2) or support with jack stand.
CAUTION: Do not allow the propeller shaft to hang from the vehicle unsupported. Damage may occur to the joint, boot, and center bearing from over-angulation.
15. Remove driveline module assembly.
 Operation, Diagnosis and Testing
OPERATION
The primary benefits of All Wheel Drive are:
Superior straight line acceleration, and cornering on all surfaces
Better traction and handling under adverse conditions, resulting in
...
 Installation
Fig. 67: Seal Protector
- HALFSHAFT
- SEAL PROTECTOR
1. Install driveline module to transmission jack. Secure module to jack.
2. Using Seal Protector 9099 (2), load halfshafts to differe ...
See also:
ENGINE BREAK-IN RECOMMENDATIONS
A long break-in period is not required for the engine and
drivetrain (transmission and axle) in your vehicle.
Drive moderately during the first 300 mi (500 km). After
the initial 60 mi (100 km), sp ...
CHILL ZONE BEVERAGE COOLER STORAGE COMPARTMENT
The Chill Zone Beverage Cooler Storage Compartment
can keep chilled beverages cool depending on ambient
temperature and climate control setting. Chill Zone is
intended for nonperishable beverages o ...
EMISSIONS INSPECTION AND MAINTENANCE PROGRAMS
In some localities, it may be a
legal requirement to pass
an inspection of this vehicle’s emissions control system.
Failure to pass could prevent vehicle registration.
For states that require a ...
