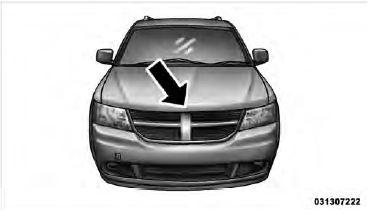
Dodge Journey: TO OPEN AND CLOSE THE HOOD
Two latches must be released to open the hood.
1. Pull the hood release lever located under the left side of the instrument panel.
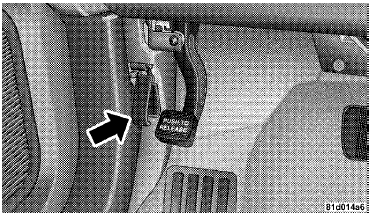
Hood Release
2. Outside of the vehicle, locate the safety latch lever near the center of the grille between the grille and hood opening. Push the safety latch lever to the right and then raise the hood.
Underhood Safety Latch
Use the hood prop rod to secure the hood in the open position. Place the upper end of the prop rod in the hole on the underside of the hood.

Hood Prop Rod
CAUTION:
To prevent possible damage:
• Before closing hood, make sure the hood prop rod
is fully seated into its storage retaining clips.
• Do not slam the hood to close it. Use a firm downward push at the center front edge of the hood to ensure that both latches engage. Never drive your vehicle unless the hood is fully closed, with both latches engaged.
WARNING:
Be sure the hood is fully latched before driving your
vehicle. If the hood is not fully latched, it could open
when the vehicle is in motion and block your vision.
Failure to follow this warning could result in serious injury or death.
 SEATS
SEATS
Seats are a primary part of the Occupant Restraint System
of the vehicle. They need to be used properly for safe
operation of the vehicle.
WARNING:
• DO NOT allow people to ride in any area of y ...
 LIGHTS
Multifunction Lever
The multifunction lever controls the operation of the
headlights, parking lights, turn signal lights, instrument
panel lights, instrument panel light dimming, interior
lights a ...
See also:
Sensor, mass air flow (MAF)
Removal
Fig. 10: MASS AIR FLOW SENSOR
1. Disconnect air flow sensor electrical connector (4).
2. Remove constant tension clamps (1), (2) securing the air flow sensor (3).
3. Remove air flow ...
Input shaft, transmission
DISASSEMBLY
Fig. 175: Snap Ring At Input Shaft
1. Remove the snap ring (2) that retains the input shaft bearing and sixth
gear to the shaft.
Fig. 176: Press Bearing From Input Shaft
2. Using ...
HOW TO USE THIS MANUAL
Consult the Table of Contents to determine which section
contains the information you desire.
The detailed Index at the back of this manual contains a
complete listing of all subjects.
Consult the ...
