Dodge Journey: Switch, backup lamp
REMOVAL

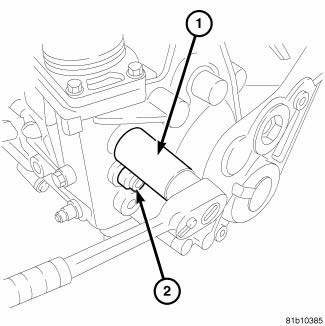
Fig. 249: Back-Up Lamp Switch
1. Disconnect battery negative cable.
2. Raise vehicle on hoist.
3. Disconnect backup lamp switch connector.
4. Remove backup lamp switch (1).
INSTALLATION

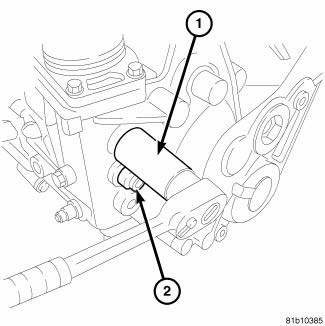
Fig. 250: Back-Up Lamp Switch
1. Install the backup lamp switch (1) with a new washer and tighten to 40 N.m (29 ft. lbs.).
2. Connect backup lamp switch connector.
3. Lower vehicle.
4. Connect battery negative cable.
 Assembly
Fig. 239: Output Shaft #2 & Needle Bearing
1. Install the reverse needle bearing (1) onto the output shaft # 2 (2).
Fig. 240: Synchronizer
NOTE: Pay attention to the direction when inser ...
 Synchronizer
DISASSEMBLY
Place synchronizer in a clean shop towel and wrap. Press on inner hub.
Carefully open up shop towel and
remove springs, balls, keys, hub, and sleeve.
CLEANING
Do not attempt to clean ...
See also:
Relay, trailer tow
DESCRIPTION
Fig. 40: Identifying Relay & Terminals
Vehicles equipped with an optional trailer tow preparation package have four
trailer tow relays, one each for the
trailer tow stop/turn ri ...
Installation
Fig. 97: Strut Upper Mounting Nuts
1. Raise the strut assembly (2) into the strut tower, aligning the three
studs on the strut assembly upper
mount with the holes in strut tower. Install the thr ...
Description, Operation
DESCRIPTION
NOTE: LHD model shown. RHD model similar.
Fig. 226: Heater Core-Description
The heater core (1) for the heating-A/C system is mounted within the HVAC air
distribution housing, ...
