Dodge Journey: Disassembly

Fig. 229: Snap Ring At Output Shaft
1. Using Snap Ring Pliers (1) remove the snap ring (2) from the output shaft # 2.
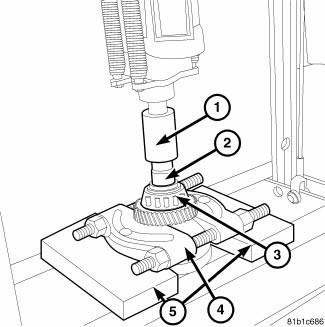
Fig. 230: Bearing From Cluster Shaft
2. Using a press, blocks, Bearing Splitter P-334 and an appropriate spacer (2) press sixth gear and case side bearing (3) from shaft.
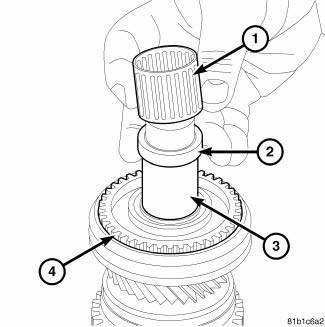
Fig. 231: Bearing Cage & Spacer Cluster
3. Remove sixth needle bearing cage (1) and spacer (2) from output shaft # 2 (3).
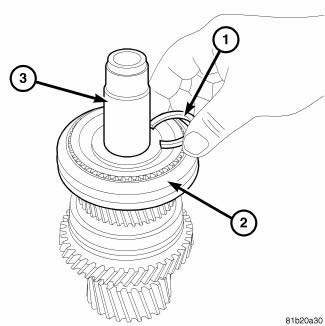
Fig. 232: Snap Ring At Output Shaft #2
4. Remove the snap ring (1) from the output shaft # 2 (3).
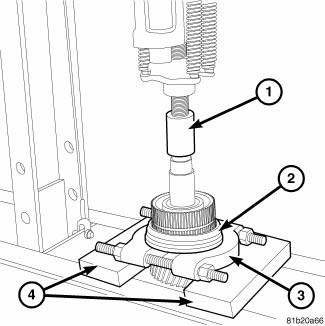
Fig. 233: Fifth Gear & Five/Six Synchronizer
5. Use Bearing Splitter P-334 (3), Blocks (4) and a press remove fifth gear and five/six synchronizer (2).
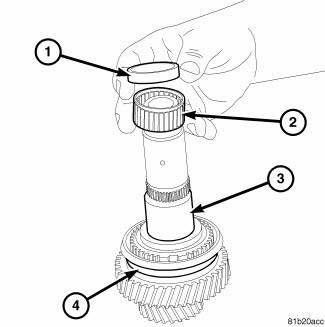
Fig. 234: #2 Bearing & Spacer
6. Remove fifth needle bearing cage (2) and spacer (1) from output shaft (3).
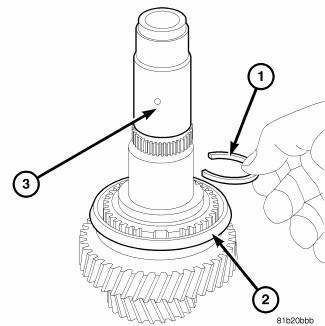
Fig. 235: Output Shaft & C-Clip
7. Remove the C-clip (1) from the output shaft (3).
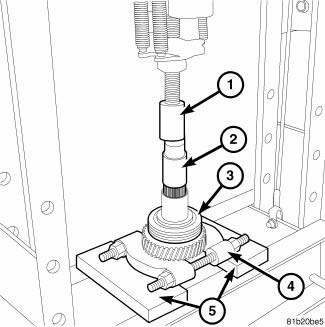
Fig. 236: Output Shaft #2 & Reverse Synchronizer
8. Use Bearing Splitter P-334 (4), Blocks (5) and a press to remove reverse gear and reverse synchronizer (3) from the output shaft # 2.
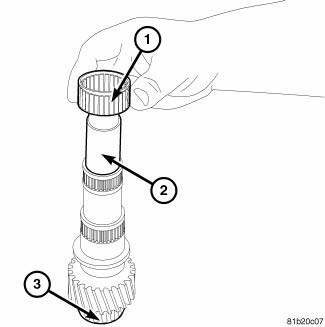
Fig. 237: Output Shaft #2 & Needle Bearing
9. Remove the reverse needle bearing (1) from the output shaft # 2 (2).
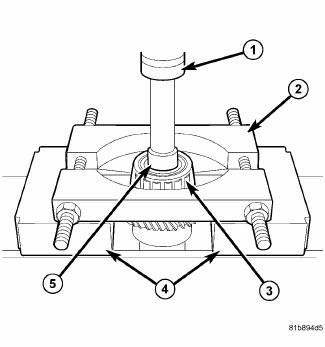
Fig. 238: Output Shaft & Bellhousing Side Bearing
10. Using a Press (1) and Splitter 1130 (2) to remove the bellhousing side bearing (3) from the output shaft # 2(5).

 Assembly
Fig. 239: Output Shaft #2 & Needle Bearing
1. Install the reverse needle bearing (1) onto the output shaft # 2 (2).
Fig. 240: Synchronizer
NOTE: Pay attention to the direction when inser ...
See also:
Switch, backup lamp
REMOVAL
Fig. 249: Back-Up Lamp Switch
1. Disconnect battery negative cable.
2. Raise vehicle on hoist.
3. Disconnect backup lamp switch connector.
4. Remove backup lamp switch (1).
INSTA ...
Standard procedure
CYLINDER HEAD OIL GALLERY CUP PLUG SERVICE
Fig. 92: Oil Gallery Cup Plug
- CUP PLUG BORE CHAMFER
- ORIGINAL CUP PLUG
- NEW CUP PLUG
- 1-2 mm
NOTE: DETERMINE WHICH CUP PLUG IS LEAKIN ...
Installation
Fig. 67: Seal Protector
- HALFSHAFT
- SEAL PROTECTOR
1. Install driveline module to transmission jack. Secure module to jack.
2. Using Seal Protector 9099 (2), load halfshafts to differe ...
