Dodge Journey: Assembly
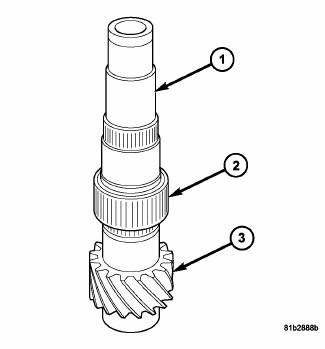
Fig. 214: First Gear Needle Bearing & Output Shaft
NOTE: Use ATF on all parts that are to be assembled in this procedure.
1. Install the first and first gear needle bearing (2) on the output shaft (1).

Fig. 215: Synchronizer
NOTE: Pay attention to the direction when inserting the 1st-2nd hub sleeve.
2. Install the 1st-2nd synchronizer onto the output shaft with (2) towards first gear.
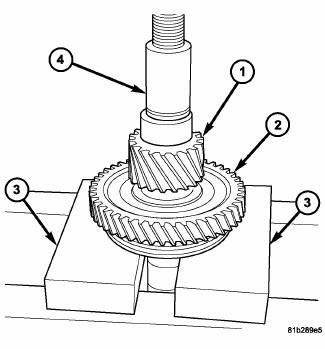
Fig. 216: First Gear & First/Second Gear Synchronizer
3. Using a press (4), install first gear (3) and first/second gear synchronizer onto output shaft.
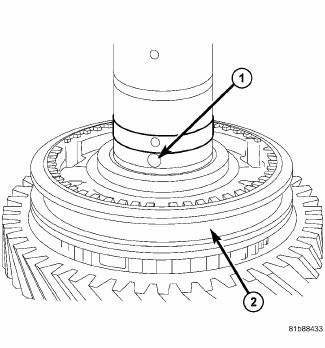
Fig. 217: Ball
4. Install the second ball (1).
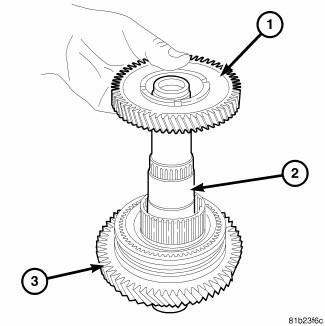
Fig. 218: Output Shaft 2nd Gear
5. Install the needle bearing on the output shaft.
6. Install second gear (1) onto output shaft (2).
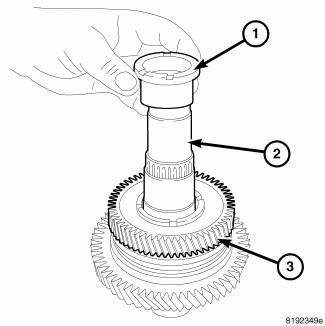
Fig. 219: Output Shaft Spacer
7. Install the inner race (1) onto the output shaft (2).
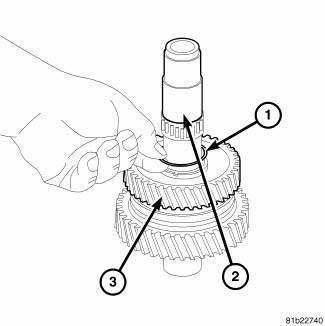
Fig. 220: Snap Ring From Output Shaft
8. Install the new C- clip (1) onto output shaft (2).
9. Install the spacer.
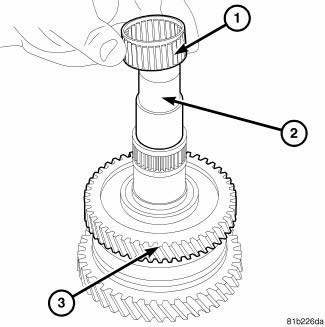
Fig. 221: Bearing & Output Shaft
10. Install the forth bearing (1) onto the output shaft (2).
11. Install forth gear onto output shaft.
Fig. 222: Synchronizer
NOTE: Pay attention to the direction when inserting the 1st-2nd hub sleeve.
12. Install the third/forth gear synchronizer onto the output shaft with (2) towards forth gear.
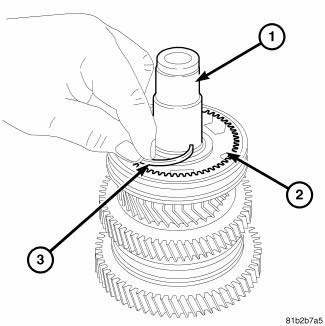
Fig. 223: Third/Fourth Gear Synchronizer
13. Using a press install third/forth gear synchronizer (2) onto output shaft (1).
NOTE: Always use the largest snap that will fit into the grove.
14. Install a new snap ring (3) to hold third/forth gear synchronizer (2) onto output shaft (1).
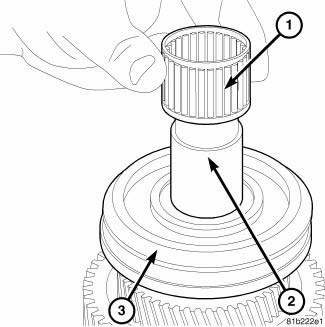
Fig. 224: Output Shaft Needle Bearing
15. Install the third needle bearing (1) onto output shaft (2).
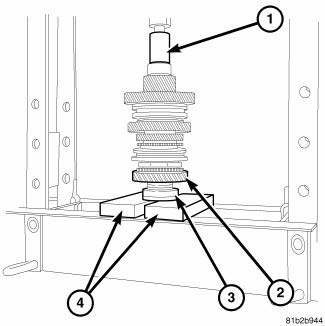
Fig. 225: 3rd Gear, Bearing & Press
16. Install third gear (2) onto output shaft.
17. Install the ball, spacer and bearing (3) using a Press (1).
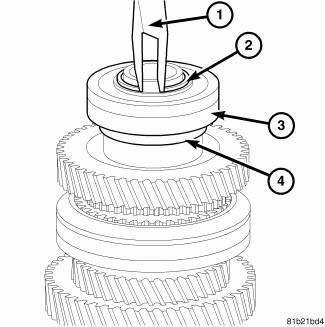
Fig. 226: Snap Ring At Output Shaft Case Bearing
NOTE: Always use the largest snap that will fit into the grove.
18. Install the new snap ring (2) from the output shaft.
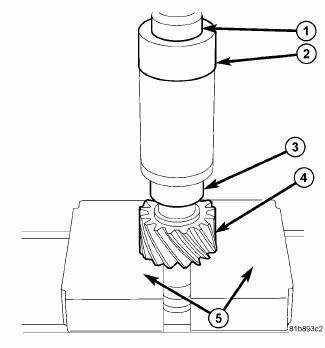
Fig. 227: Installing Cylindrical Roller Bearing Race
19. Using installer 6052 (2) and a Press (1) install the cylindrical roller bearing race (3) on the input shaft.
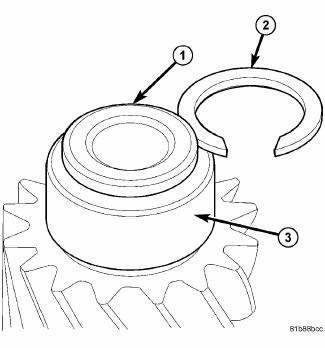
Fig. 228: Input Lower Snap Ring
20. Install the shaft snap ring (2).
 Disassembly
Fig. 200: Snap Ring At Output Shaft Case Bearing
1. Remove the snap ring (2) from the output shaft.
Fig. 201: Output Shaft Case Bearing And Gear
2. Use Bearing Splitter P-334 (3), Cage 8925-3 ( ...

See also:
Manifold, exhaust, crossover
Removal
Fig. 287: Belly Pan
- belly pan fasteners
- belly pan
1. Remove the belly pan (2).
Fig. 288: Exhaust Extension Pipe
2. Remove the fasteners (1), and remove the exhaust extensio ...
Description, Operation
DESCRIPTION
Fig. 231: Receiver/Drier Description
The A/C receiver/drier (1) stores unused refrigerant, filters the
refrigerant, helps remove moisture from the
refrigerant and retains any refrig ...
Installation
Fig. 164: Removing/Installing Bellhousing Upper & Lower Bolts
NOTE: If transaxle assembly is being replaced or overhauled (clutch
and/or seal
replacement), it is necessary to perform th ...
