Dodge Journey: Removal
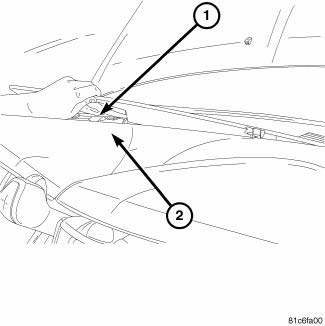
Fig. 393: Removing/Installing Defroster Cover
1. Disconnect the negative battery cable.
2. Using a trim stick remove the defroster cover (1).
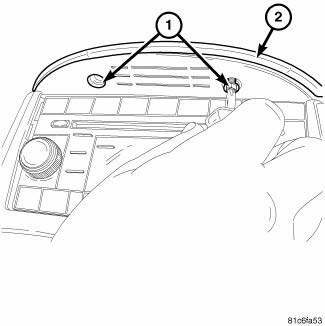
Fig. 394: Removing/Installing Screws At Center Stack Cover
3. Remove the screws (1) at the center stack cover (2).

Fig. 395: Removing/Installing Center Stack Cover
4. Remove the center stack cover (1).
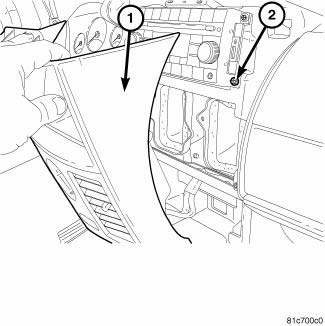
Fig. 396: Pulling Center Stack Back
5. Pull center stack (1) back.
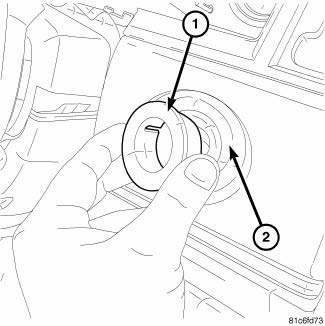
Fig. 397: Removing/Installing Ignition Switch Bezel
6. Remove the ignition switch bezel (1) from I/P cover (2).
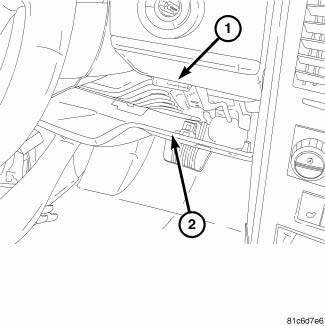
Fig. 398: Identifying Knee Blocker
7. Remove the knee blocker (2).
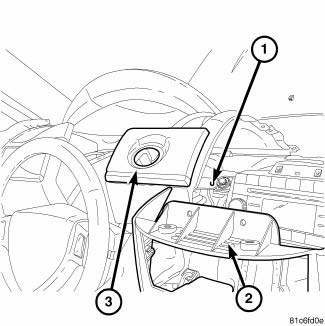
Fig. 399: Removing/Installing I/P Cover
8. Remove the I/P cover (3) (if equipped).
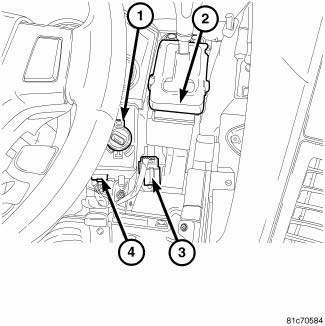
Fig. 400: Identifying Electrical Connectors At WIN & Shifter
9. Remove the cluster bezel.
10. Remove the shift knob.
11. Unplug the electrical connectors (3, 4) at the WIN (1) and the shifter (2).
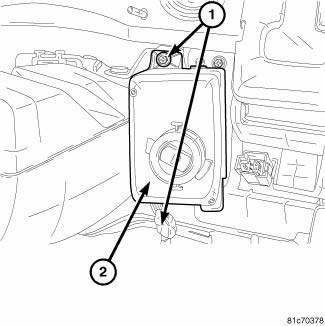
Fig. 401: Removing/Installing Screws At Win
12. Remove the screws (1) at the WIN (2).
13. Remove the WIN to gain access to the lower shifter bolts.
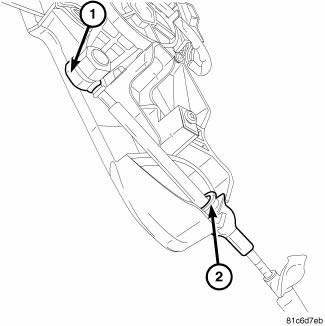
Fig. 402: Identifying Shift Cable At Shifter
NOTE: Ensure the lock tab at the shifter housing (2) is depressed before pulling the cable from the shifter housing.
14. Remove the shift cable (1, 2) at the shifter.
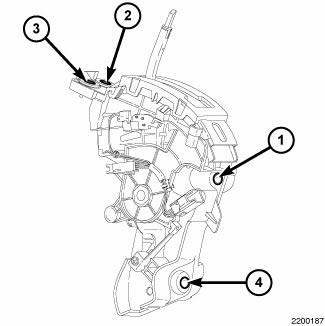
Fig. 403: Identifying Shifter Mounting Bolts
15. Remove the shifter mounting bolts 1 thru 4.
16. Remove the shifter.

 Installation
Fig. 404: Identifying Shifter Mounting Bolts
1. Install the shifter mounting bolts and tighten to 20 N.m (15 ft. lbs.) in
the proper sequence as indicated on
drawing.
Fig. 405: Identifying Sh ...
See also:
Insulator, engine mount, left
Removal
Fig. 228: Belly Pan
1. Disconnect and isolate the negative battery cable.
2. Remove throttle body air inlet hose and air cleaner housing assembly.
3. Remove the belly pan (2).
...
Removal
NOTE: Before proceeding, review all Warnings and Cautions.
1. Raise and support the vehicle.
Fig. 16: TIRE AND WHEEL MOUNTING
2. Remove the wheel mounting nuts (3), then the tire and wheel a ...
Cleaning, Inspection
CLEANING
Drain cooling system and refill with clean water. Refer to drain and fill
procedures in this service information .
Run engine with radiator cap installed until upper radiator hose is ho ...
