Dodge Journey: Installation
2.4L
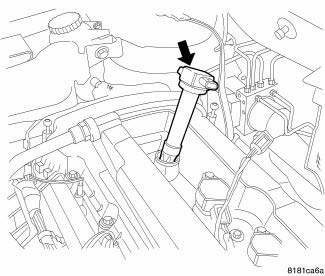
Fig. 17: Removing/Installing Ignition Coil
1. Install ignition coil onto spark plug.
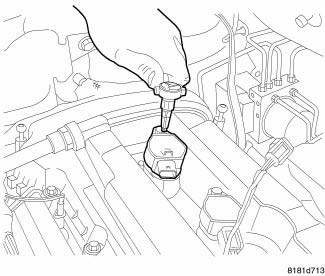
Fig. 18: Removing/Installing Ignition Coil Mounting Bolts
2. Install ignition coil mounting bolt, tighten to 9 N.m (79.5 in. lbs.).
3. Connect ignition coil electrical connectors.
4. Connect negative battery cable, tighten nut to 5 N.m (45 in. lbs.).
5. Install engine cover.
2.7L
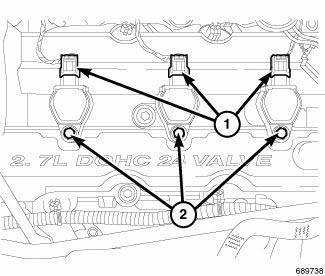
Fig. 19: Removing/Installing Electrical Connectors And Mounting Bolts At
Ignition Coil
1. Align ignition coil with top of spark plug.
2. Twist and push down ignition coil assembly onto spark plug and valve cover. Install mounting bolt (2) and tighten to 7.5 N.m (65 in. lbs.).
3. Connect electrical connector (1) to ignition coil.
4. Install upper intake manifold.
5. Connect negative battery cable.
3.5L
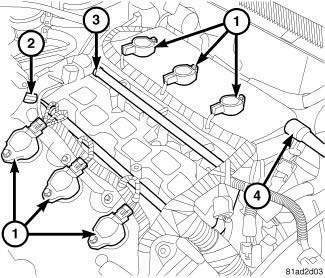
Fig. 20: Ignition Coils And Fuel Rail
1. Install ignition coil (1).
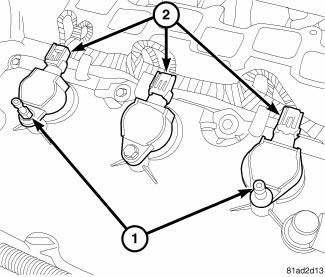
Fig. 21: Ignition Coils
2. Install engine cover studs (1) in the two outside ignition coils on the front of the engine. Install bolts on the other ignition coils.
3. Tighten studs and bolts to 8 N.m (71 in. lbs.).
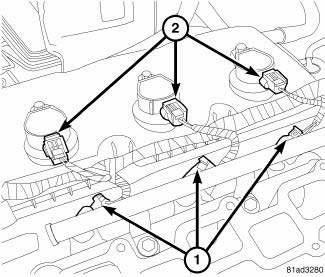
Fig. 22: Identifying Coil & Fuel Injector Connectors
4. Connect electrical connector and lock (2).
5. Install intake manifold.
6. Connect negative battery cable and tighten nut to 5 N.m (45 in. lbs.).
7. Install engine cover.
 Removal
2.4L
Fig. 11: Identifying Ignition Coil Electrical Connectors
NOTE: Prior to removing coil, spray compressed air around coil top to
make sure no
dirt drops into the spark plug tube.
The ...
 Module, glow plug
DESCRIPTION
Fig. 23: Locating Diesel Glow Plug Control Module
The glow plug control module is mounted to the fuel filter/water separator
bracket, and is controlled by the
engine control module. ...
See also:
A WORD ABOUT YOUR KEYS
Your vehicle uses a keyless ignition system. This system
consists of a Key Fob with Remote Keyless Entry (RKE)
transmitter and a Wireless Ignition Node (WIN) with
integral ignition switch. You can ...
Ring(s), piston
Standard Procedure
PISTON RING FITTING
Fig. 200: CHECK GAP ON PISTON RINGS
- FEELER GAUGE
1. Wipe cylinder bore clean. Insert ring and push down with piston to ensure
it is square in bore ...
Mechanism, gearshift
REMOVAL
Fig. 193: Shift Cables To Shifter
1. Detach gear shift boot from console.
2. Remove the center console assembly.
3. Remove rear power window switch (if equipped) and disconnect ha ...
