Dodge Journey: Removal
2.4L

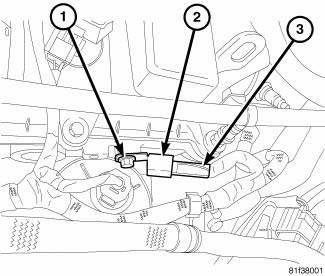
Fig. 3: Capacitor 2.4L
- - Bolt
- - Capacitor
- - Connector
1. Disconnect and isolate negative battery cable at battery.
2. Remove engine cover.
3. Remove electrical connector (3).
4. Remove mounting bolt (1) and ignition capacitor (2).
2.7L 1st

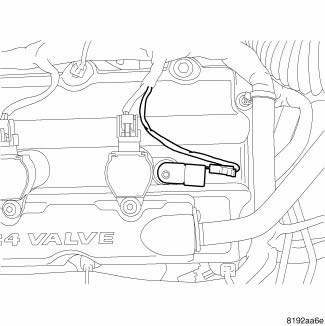
Fig. 4: 1st Ignition Capacitor - 2.7L
1. Disconnect and isolate the negative battery cable.
2. Disconnect the electrical connector.
3. Remove nut and capacitor.
2.7L 2nd

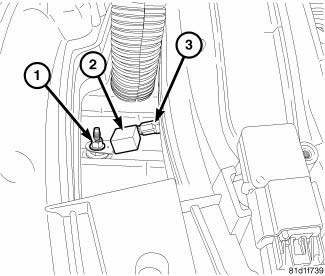
Fig. 5: 2nd Ignition Capacitor - 2.7L
The ignition capacitor is located under the intake manifold on the drivers side of the engine.
1. Disconnect and isolate negative battery cable at battery.
2. Remove electrical connector (3).
3. Remove mounting bolt (1) and ignition capacitor (2).
3.5L

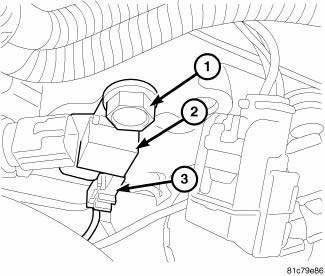
Fig. 6: Ignition Capacitor - 3.5L
The ignition capacitor is located on the drivers side of the engine.
1. Disconnect and isolate negative battery cable at battery.
2. Remove electrical connector (3).
3. Remove mounting bolt (1) and ignition capacitor (2).
 Installation
2.4L
Fig. 7: Capacitor 2.4L
- Bolt
- Capacitor
- Connector
1. Install ignition coil capacitor (2) and bolt (1), tighten bolt to 10 N.m
(88.5 ft. lbs.).
2. Connect electrical connect ...
See also:
Description, Operation
DESCRIPTION
There are two different batteries available for this vehicle. Vehicles
equipped with a diesel engine utilize a
spiral cell battery with recombination technology. This is a maintenance- ...
Installation
BULB
Each rear lamp unit for this vehicle consists of two pieces. An outer rear
lamp unit that is secured at the rear of
each quarter panel includes bulbs for the park (or tail) lamps, the brake ( ...
Removal
1. Release the parking brake.
2. Manually release the parking brake cable tension.
3. Raise and support the vehicle.
Fig. 206: TIRE AND WHEEL MOUNTING
4. Remove wheel mounting nuts (3), t ...

