Dodge Journey: Removal
2.7L ENGINE

Fig. 22: Belly Pan
- - BELLY PAN
- - EXHAUST EXTENSION PIPE
1. Remove the belly pan (2).
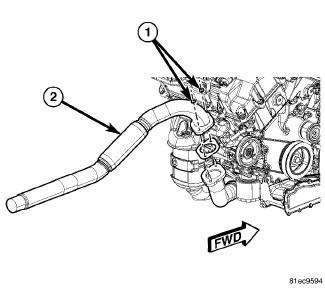
Fig. 23: 2.7L Extension Pipe
2. Remove the fasteners (1), and remove the exhaust extension pipe (2) from the cross under pipe.
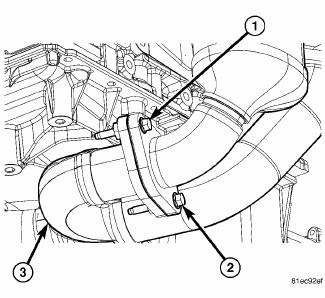
Fig. 24: Cross Under Pipe Fasteners
3. Remove the rear maniverter-to-cross under pipe fasteners (1) and (2).
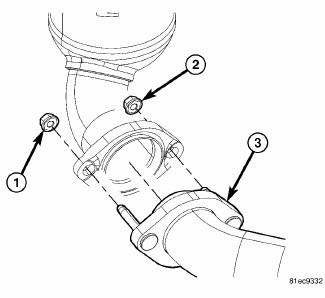
Fig. 25: Maniverter To Cross Under Fasteners
4. Remove the front maniverter-to-cross under fasteners (1) and (2), and remove the cross under pipe (3).
3.5L ENGINE
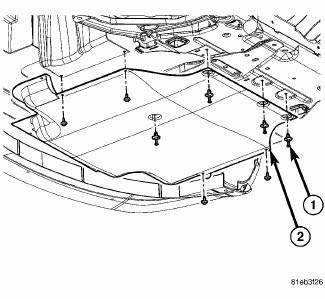
Fig. 26: Belly Pan
1. Raise vehicle on hoist.
2. Remove the fasteners (1) and remove the belly pan (2).
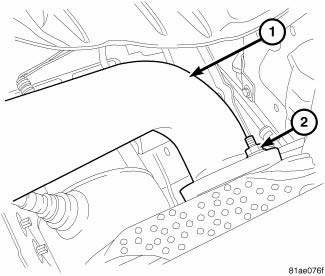
Fig. 27: Exhaust System Pipe
- - EXHAUST PIPE
- - NUTS
3. Disconnect exhaust system pipe (1) from cross under pipe.
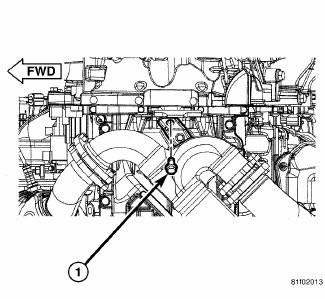
Fig. 28: Cross Under To Bracket
4. Remove cross-under pipe bracket to cross under pipe bolt (1).
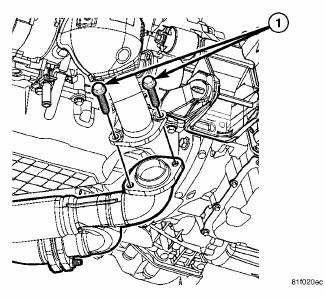
Fig. 29: Left Maniverter To Cross Under
5. Remove cross under to front maniverter bolts and nuts (1).
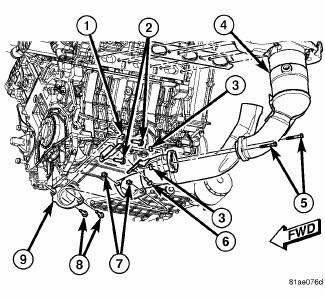
Fig. 30: Cross Under Pipe - 3.5L
- - BRACKET
- - BRACKET MOUNTING BOLTS
- - CROSS UNDER PIPE TO REAR MANIVERTER NUTS
- - REAR MANIVERTER
- - REAR MANIVERTER TO CROSS UNDER BOLTS
- - CROSS UNDER PIP TO BRACKET BOLTS
- - CROSS UNDER PIPE TO FRONT MANIVERTER NUTS
- - CROSS UNDER PIPE TO FRONT MANIVERTER BOLTS
- - FRONT MANIVERTER
6. Remove cross under to rear maniverter bolts (5) and nuts (3).
7. Remove cross under pipe.
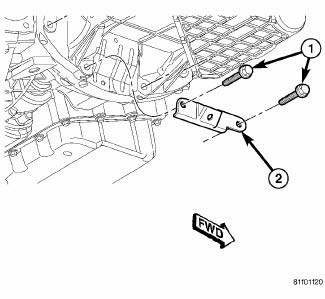
Fig. 31: Cross Under Bracket Transmission Bracket
8. If necessary, remove cross under transmission bracket (2).

 Installation
2.7L ENGINE
Fig. 32: Maniverter To Cross Under Fasteners
1. Install the cross under pipe (3). and the front maniverter-to-cross under
fasteners (1) and (2). Tighten to
27 Nm (20 ft. lb.).
Fi ...
See also:
Standard procedure
BRAKE ROTOR MACHINING
NOTE: Refacing the rotor is not required each time the brake pads are
replaced, only
when the need is foreseen.
Any servicing of the rotor requires extreme care to ma ...
Disassembly
Fig. 28: Identifying Solenoid/Pressure Switch Assembly & Gasket
- SOLENOID/PRESSURE SWITCH ASSEMBLY
- GASKET
NOTE: If transaxle is being overhauled (clutch and/or seal
replacement ...
Disassembly
Fig. 10: Drain Plug
1. Remove drain plug (1) and allow transmission oil to drain.
Fig. 11: Back-Up Lamp Switch
2. Remove backup lamp switch (1).
Fig. 12: Shift Cable Bracket
3. Remove the b ...
