Dodge Journey: Insulator, engine mount, front
Removal
1. Raise vehicle.
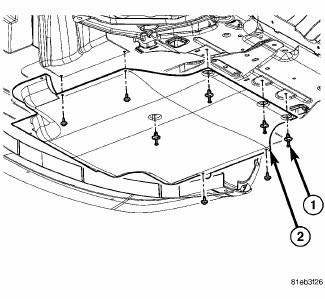
Fig. 222: Belly Pan
- - belly pan fasteners
- - belly pan
2. Remove the belly pan (2).
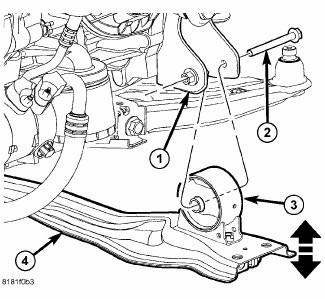
Fig. 223: Front Engine Mount Through Bolt
3. Remove front mount to bracket horizontal through bolt (2).
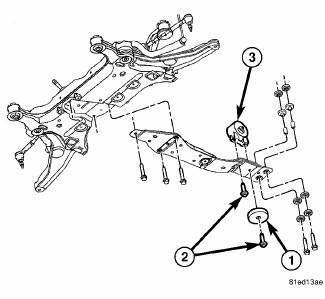
Fig. 224: Front Mount Vertical Bolts
4. Remove front mount vertical bolts (2).
5. Remove front mount (3).
Installation
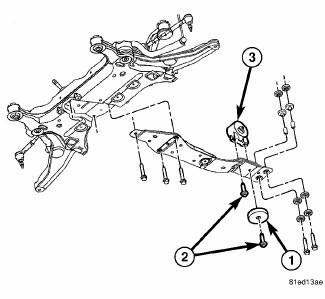
Fig. 225: Front Mount Vertical Bolts
1. Install the front mount (3).
2. Install the front mount vertical bolts (2).
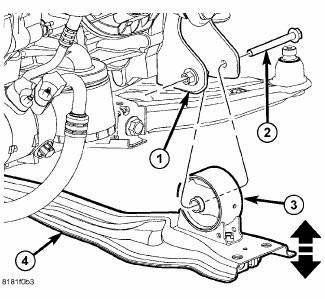
Fig. 226: Front Engine Mount Through Bolt
3. Install the front mount to bracket horizontal through bolt (2).
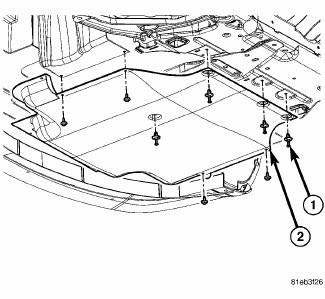
Fig. 227: Belly Pan
- - belly pan fasteners
- - belly pan
4. Install the belly pan (2).
 Adjustments
ADJUSTMENT
The right and left support assemblies are slotted to allow for right/left
drive train adjustment in relation to drive
shaft assembly length.
Check and reposition right and left engin ...
 Insulator, engine mount, left
Removal
Fig. 228: Belly Pan
1. Disconnect and isolate the negative battery cable.
2. Remove throttle body air inlet hose and air cleaner housing assembly.
3. Remove the belly pan (2).
...
See also:
Description, Operation
DESCRIPTION
Fig. 1: Identifying 41TE Automatic Transaxle Components
- TRANSAXLE CASE
- TORQUE CONVERTER
- OIL PUMP
- INPUT SPEED SENSOR
- UNDERDRIVE CLUTCH
- OVERDRIVE CLUTCH
- REVE ...
LIFTGATE
The liftgate can be unlocked or locked with the Remote
Keyless Entry (RKE) transmitter or by activating the
power door lock switch located on either front door trim
panel.
NOTE: The liftgate canno ...
LIGHTS
Multifunction Lever
The multifunction lever controls the operation of the
headlights, parking lights, turn signal lights, instrument
panel lights, instrument panel light dimming, interior
lights a ...
